some pics and info from my t56 swap
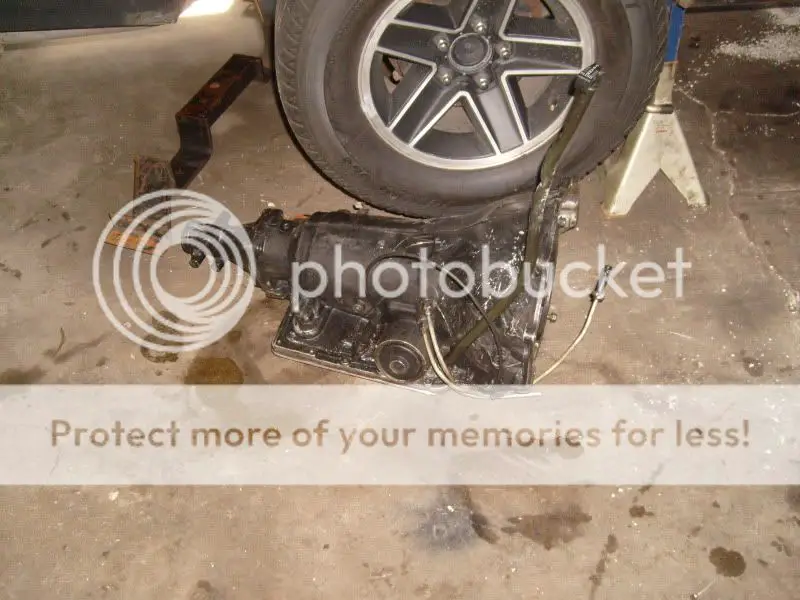
Its funny how replacing a rusty floor turned into a T56 swap ha ha but first things first!! out with the old!! (700-r4 boat anchor lol) and in with the new!!
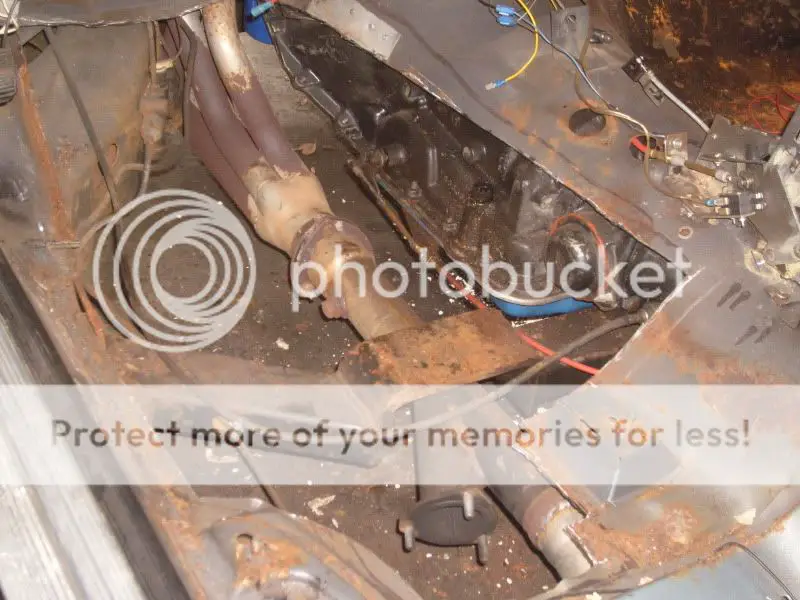
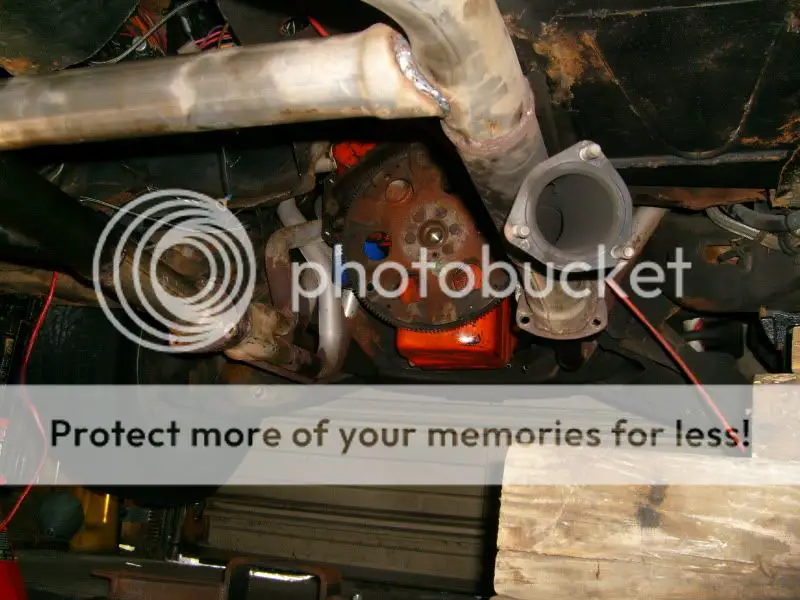
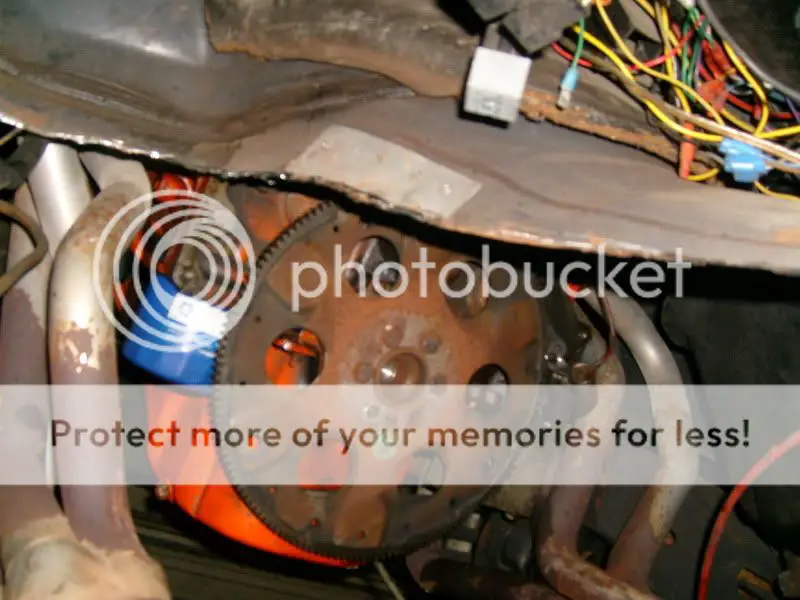
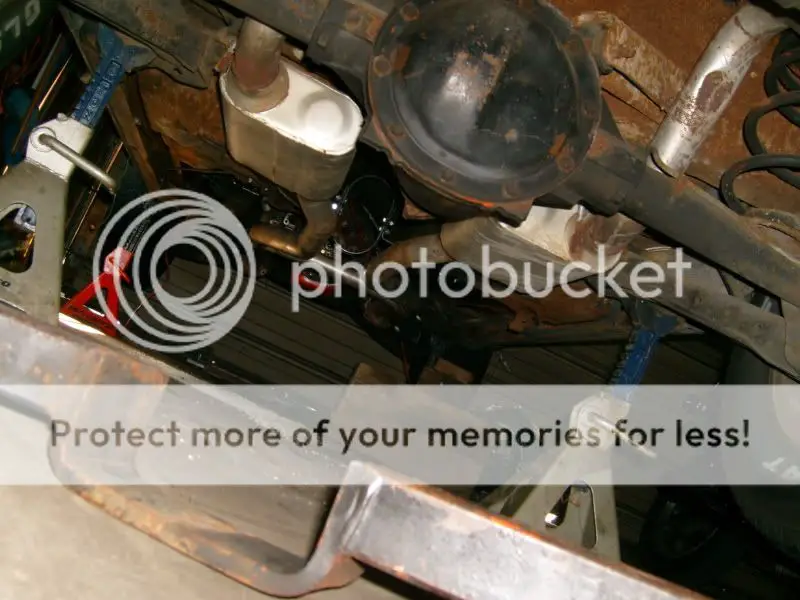
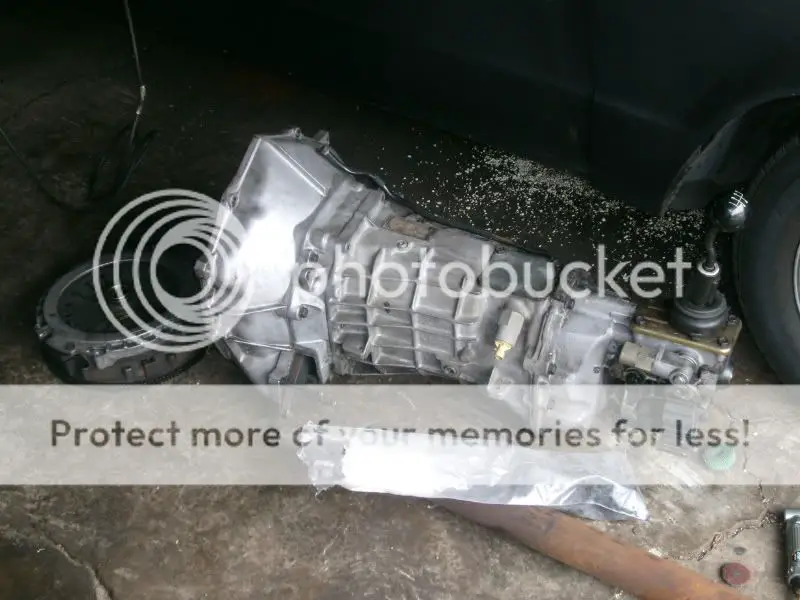
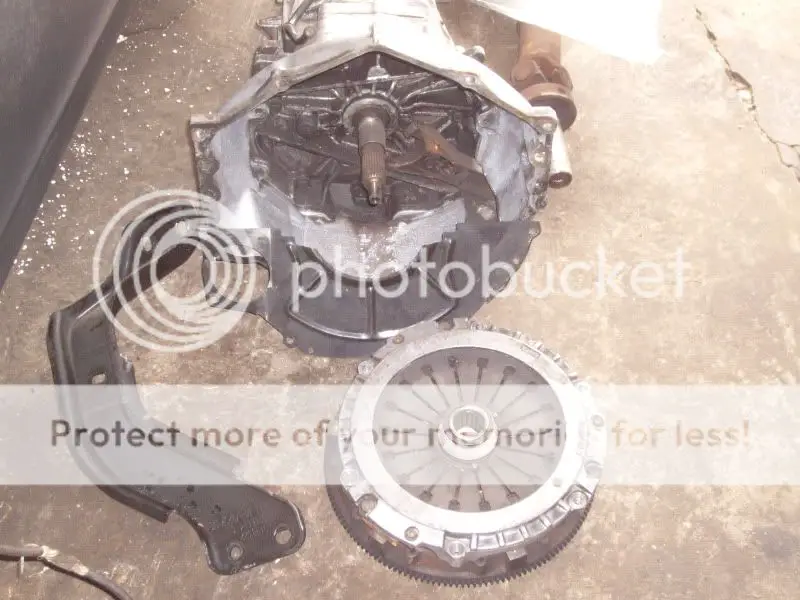
1997 Firebird T56 trans, shifter, shifter ball, bell housing, clutch, pressure plate, flywheel, pedal assembly, trans mount, hydraulics, F-body T56 crossmember, inspection cover, and drive shaft fresh out of the crate from an ebay buy. 1,525.00 shipped to my place via truck freight not too bad I guess :roll:
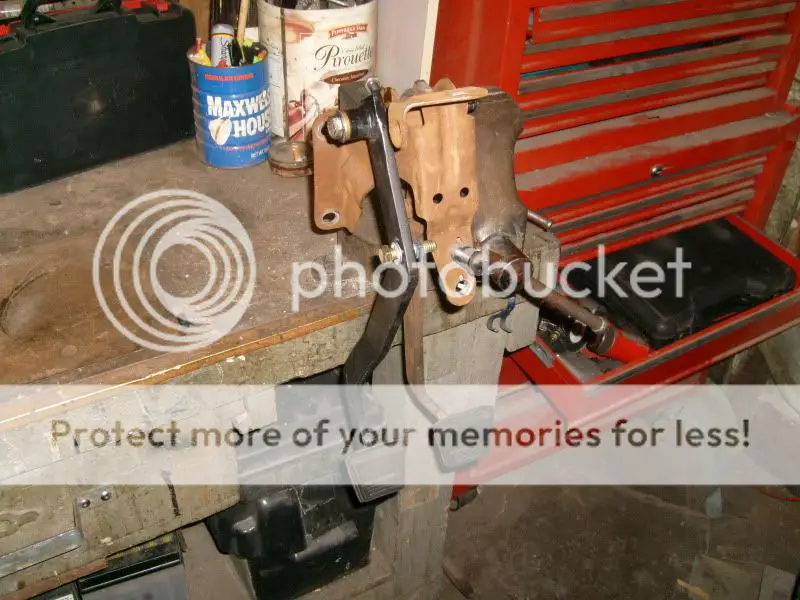
installing the John Bzdel "bolt in" pedal:
original pedal basket
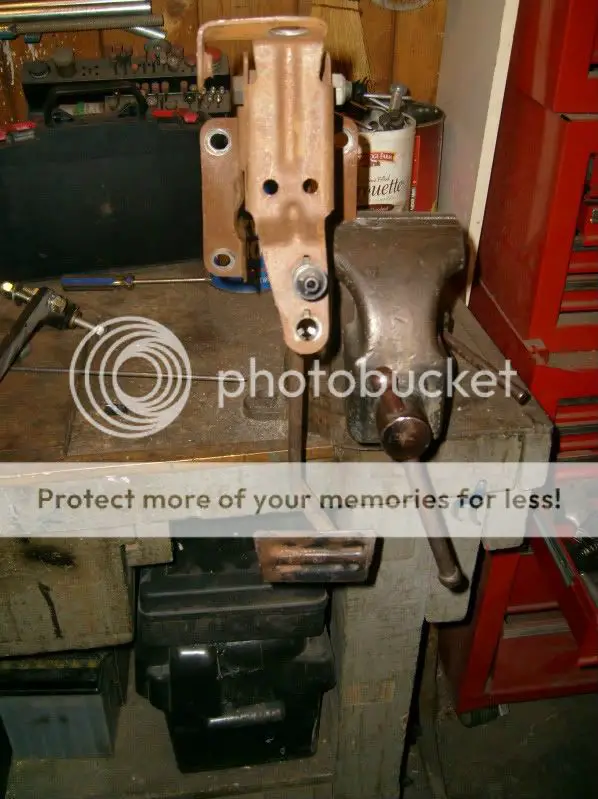
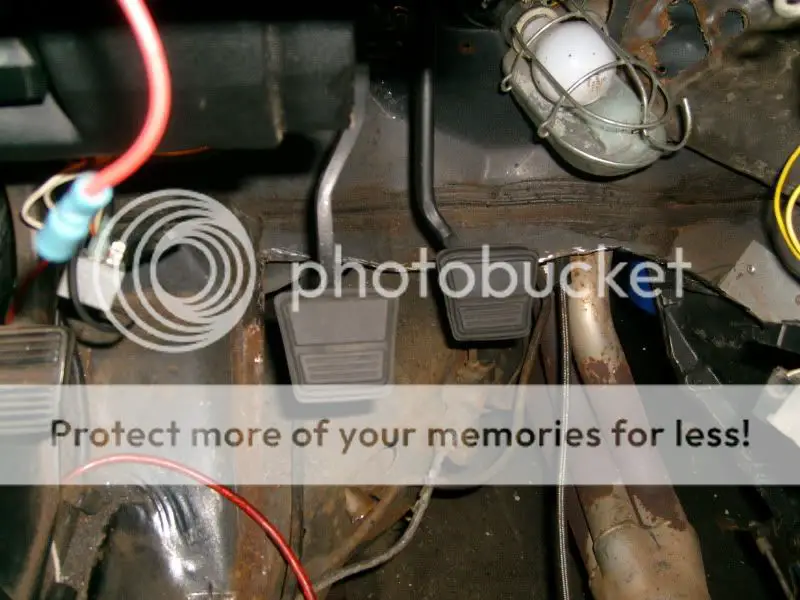
need to cut metal pedal pad down to accept smaller rubber pedal pad used for stick shift car applications, pedal bolted in, brake metal pedal pad cut, rubber pads installed on clutch and brake.
Modifying John Bzdel pedal to get the F body geometry and pedal swing/travel:
this was something I went above and beyond to do as the John Bzdel pedal is a bolt in and works just fine!!!, I have heard other people were not satisfied with the release point of the clutch/clutch pedal travel as it had a shorter pedal stroke compared to the factory A/G-body or F-body travel. (I can not confirm or deny this fact as I never installed his clutch pedal and never operated it before I modified it) I wanted more of a stock feel and stroke (based off of what I heard from other members) and since I had an F body pedal assembly that came with the purchase of the T56, I compared the stock clutch pedal of the 1997 F-body to John Bzdel's pedal and modified it and my pedal basket to mimic the F body pedal and fit it as required please see below. (there are other options for adding a clutch pedal to your A/G body such as modifying pedals from a 82'-92' F-body, or adapting a pedal assembly from a factory manual 78-81 A body with angled adapter plates sandwiched between the booster and body to hold a T5 or T56 clutch master, but I went with John Bzdel pedal as it seemed to have the least amount of fabrication needed to be installed and since I had purchased the pedal prior to reading what others thought of it, I just worked with what I had).
after cleaning and painting the booster, and pedal basket assembly I bolted in the pedal with the supplied longer bolt into the brake pedal hinge point, I attached the booster to the pedal basket using washers in between to make up for the sheet metal of the body. I then connected the brake pedal to the booster push rod. This placed the brake pedal at resting pedal position/height.
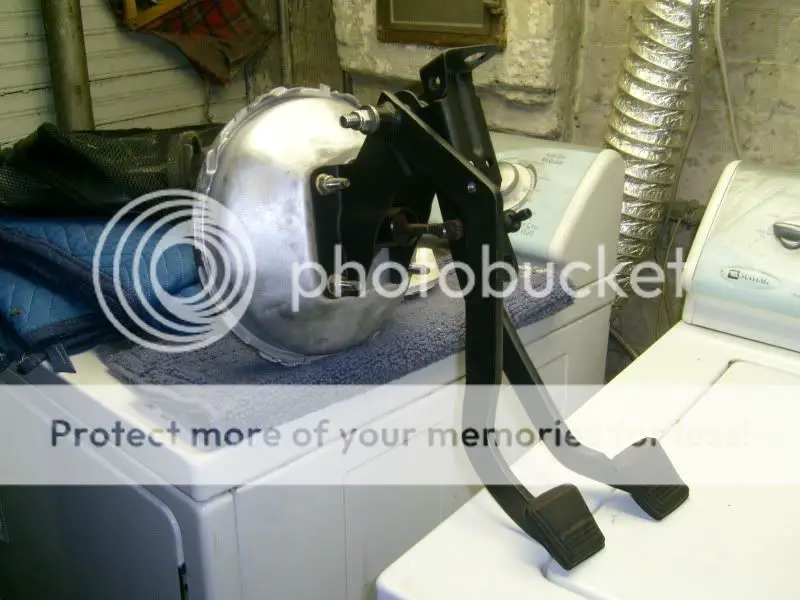
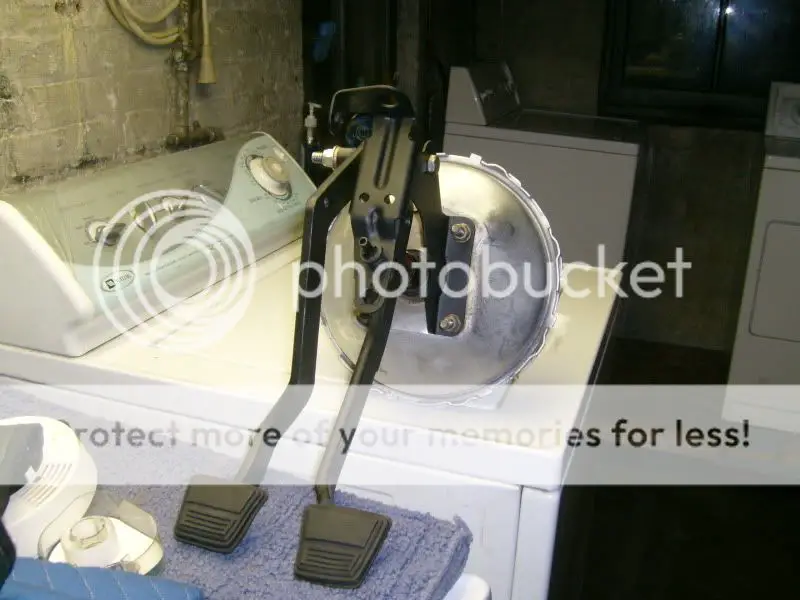
I then separated the F-body clutch pedal from the F body pedal cluster (came with trans purchase from Ebay) and held it up beside John B's clutch pedal and marked where the F-body pedal pivot point sits. John B's pedal is spot on!! when compared to the F body pedal as far as front to back bends (not side to side as you can see in the pics this is because it is engineered for the A/G body cars) even the clutch master mounting point is dead on!! the pedal is a great product!!
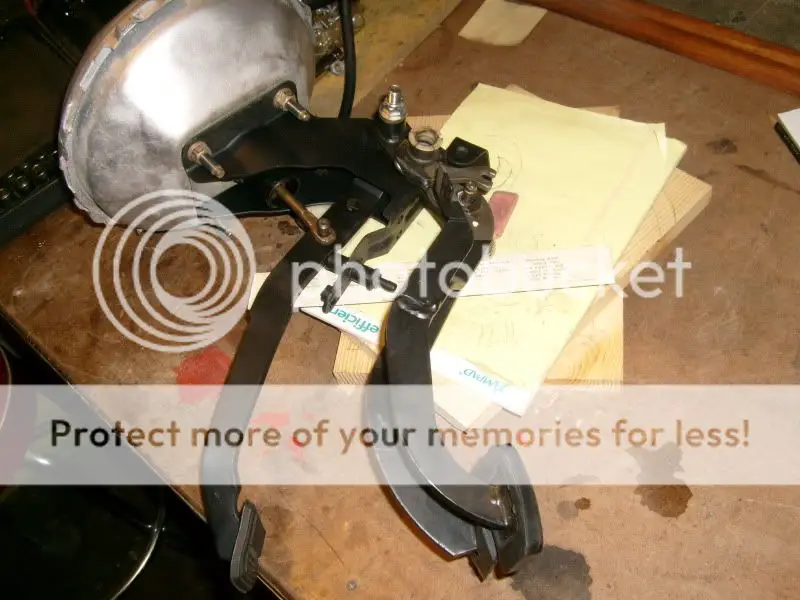
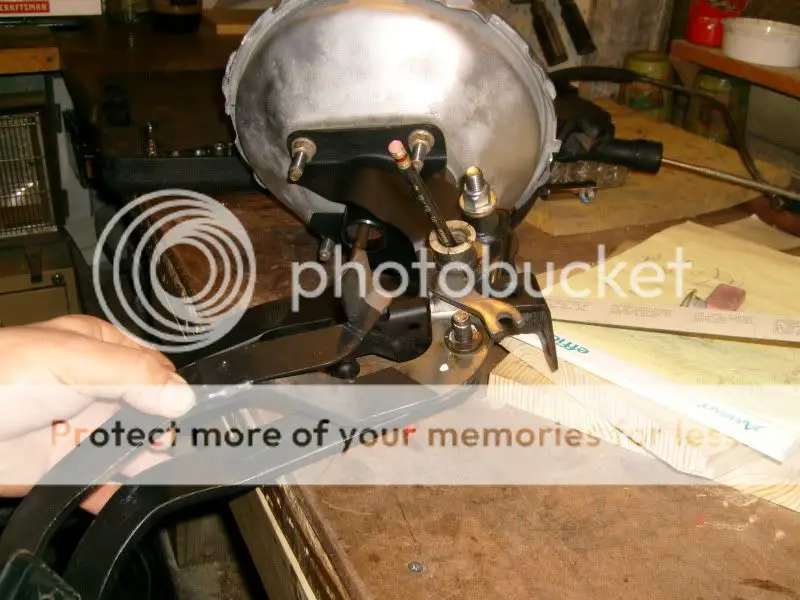
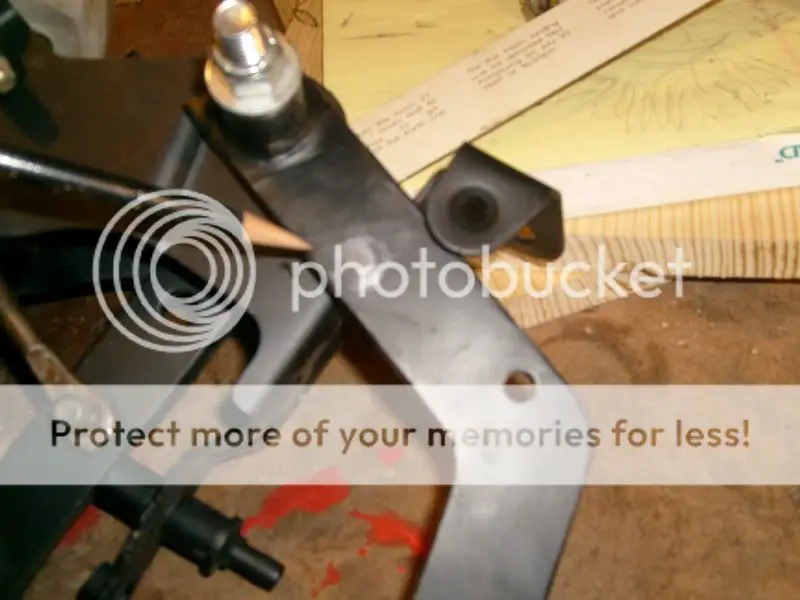
with the John B clutch pedal bolted in and it's pedal pad lined up to the exact height of the brake pedal pad; I inspected where the new pivot point would be needed on the pedal basket, using the mark made from the previous step. At this point I could see I would have to add some metal as there was not enough metal in this location to mount a bolt, so I fabricated a plate that would then provide enough metal for a bolt to sit and still not interfere with brake pedal or other components.
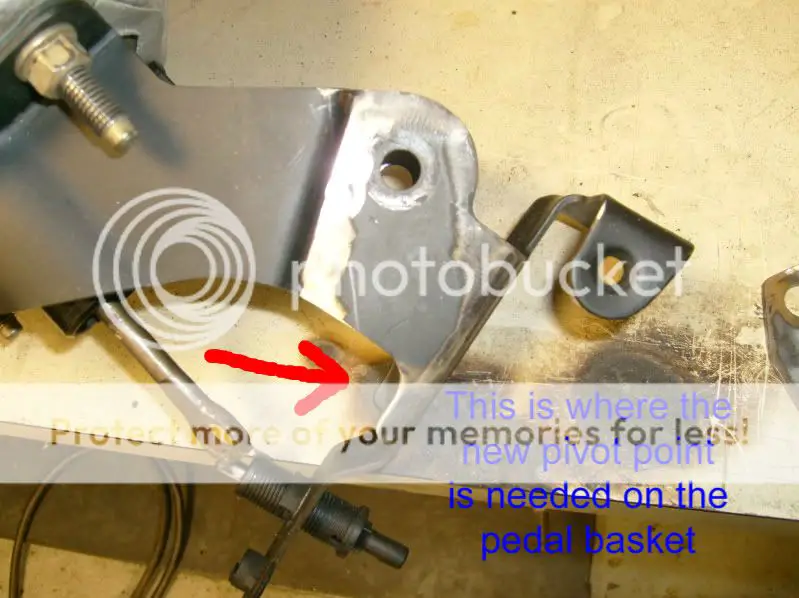
the plate with hole drilled for original mounting point for brake pedal.
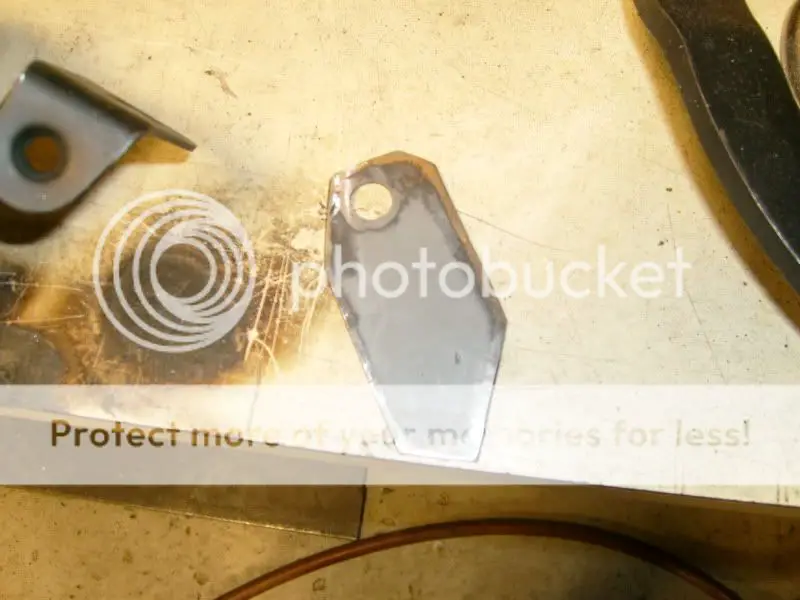
plate mocked up.
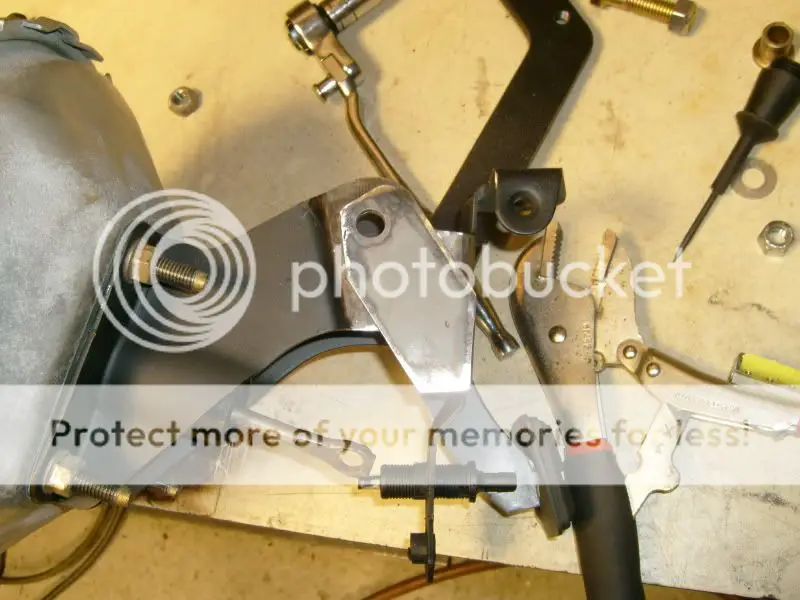
pedal basket grinded for good conductivity for welding
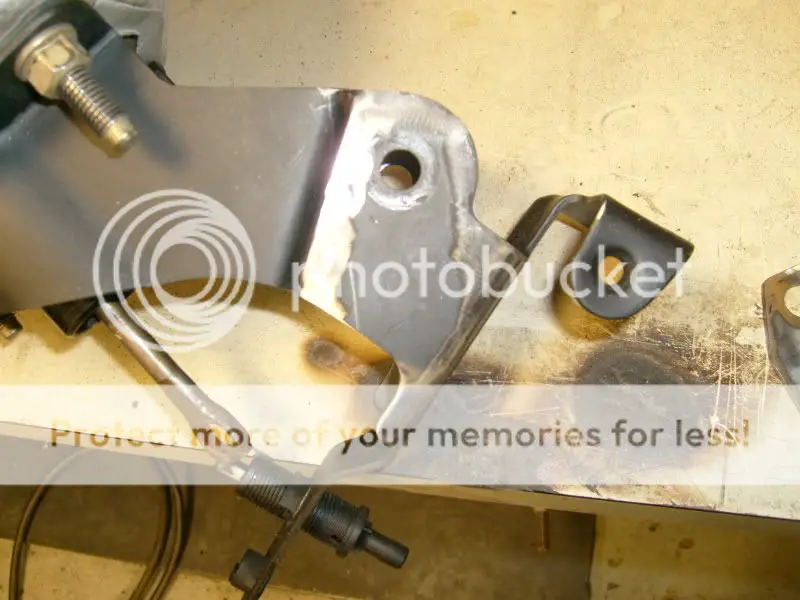
placed bolt through brake pedal pivot point to hold plate in correct spot and welded.
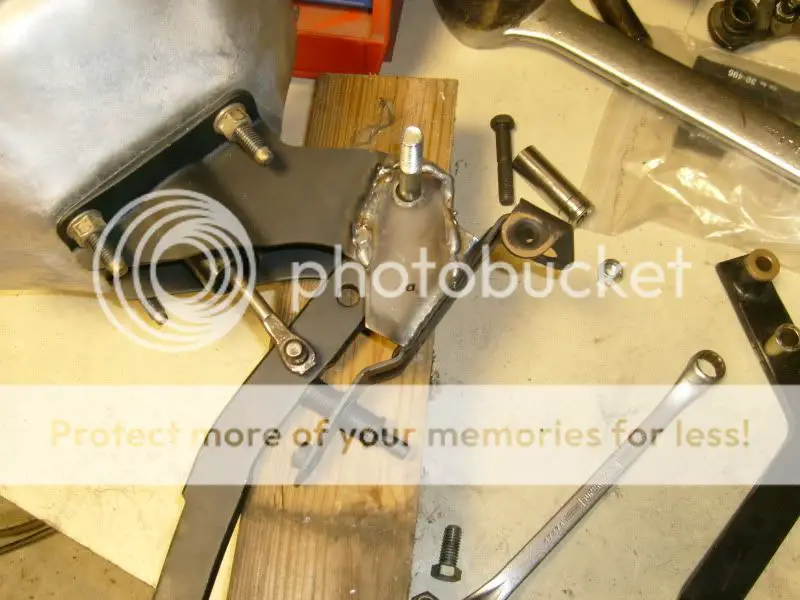
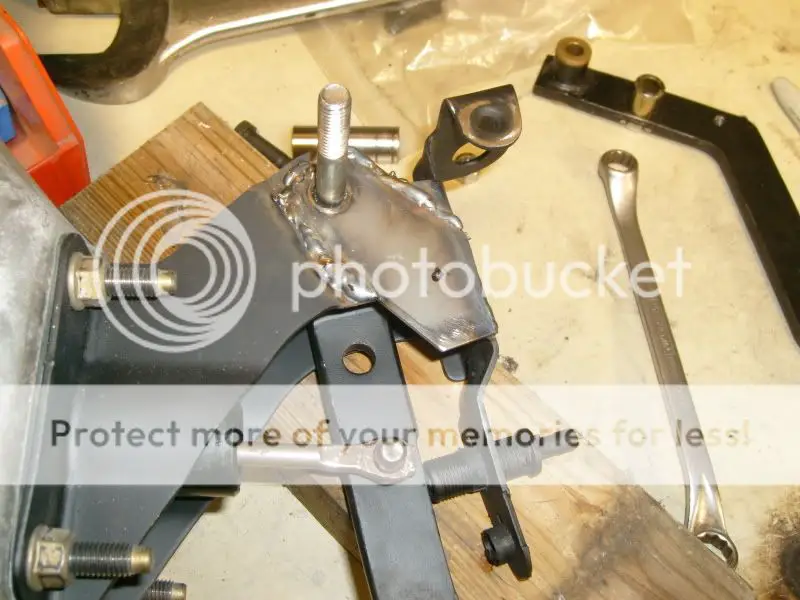
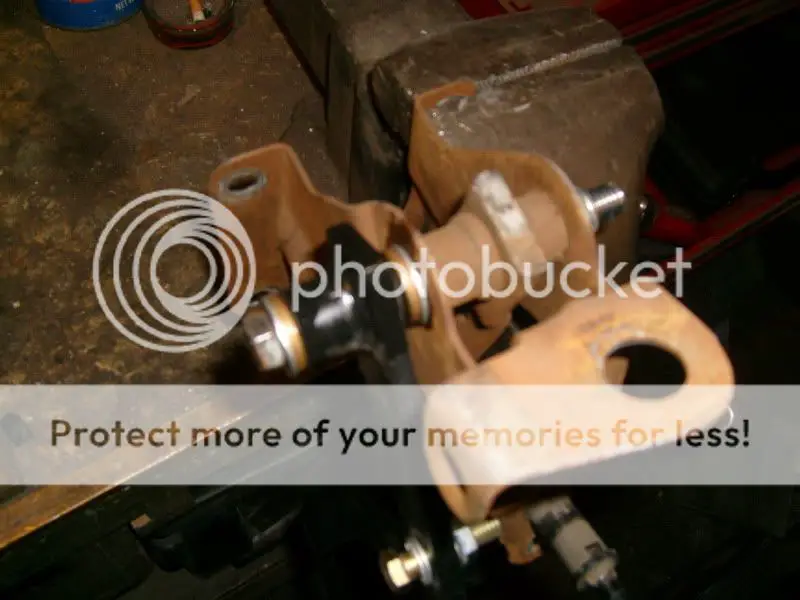
I then installed a new pivot point on John B's pedal using some left over round stock from a suspension kit my friend had laying around, cut it to match (width including the bronze bushing supplied with John B's pedal) then shortened the pedal to remove the original pivot point, pressed in the pivot point, and laid a few welds for extra insurance.
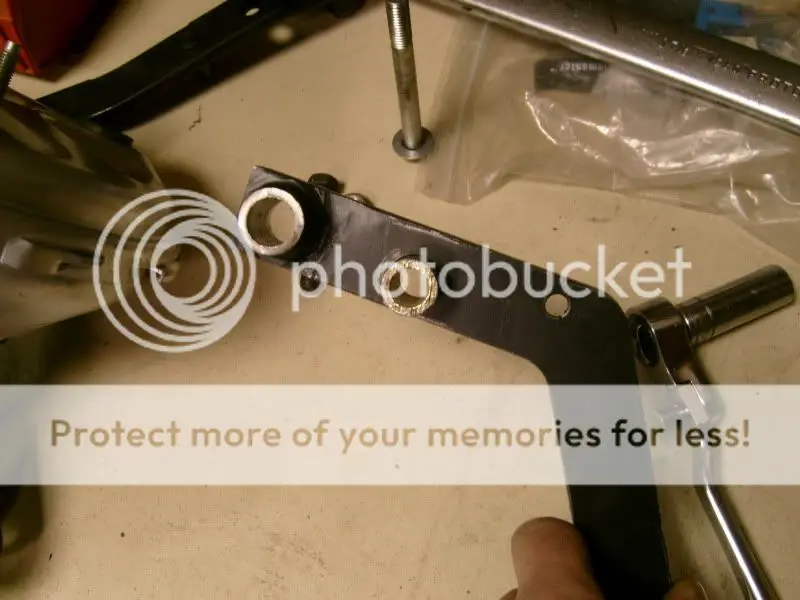
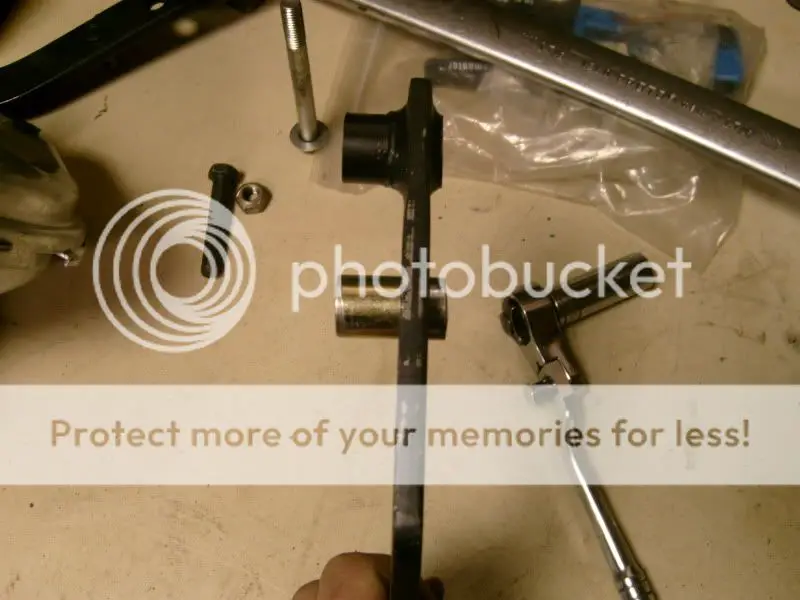
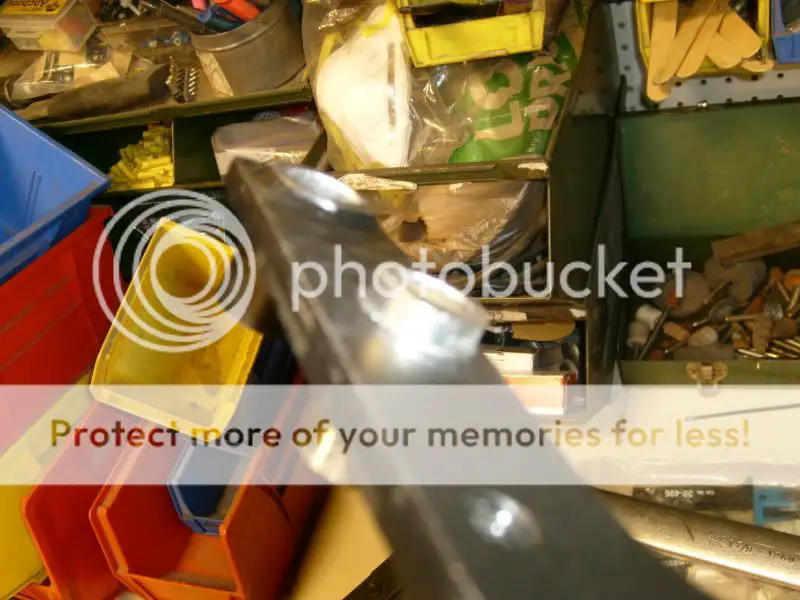
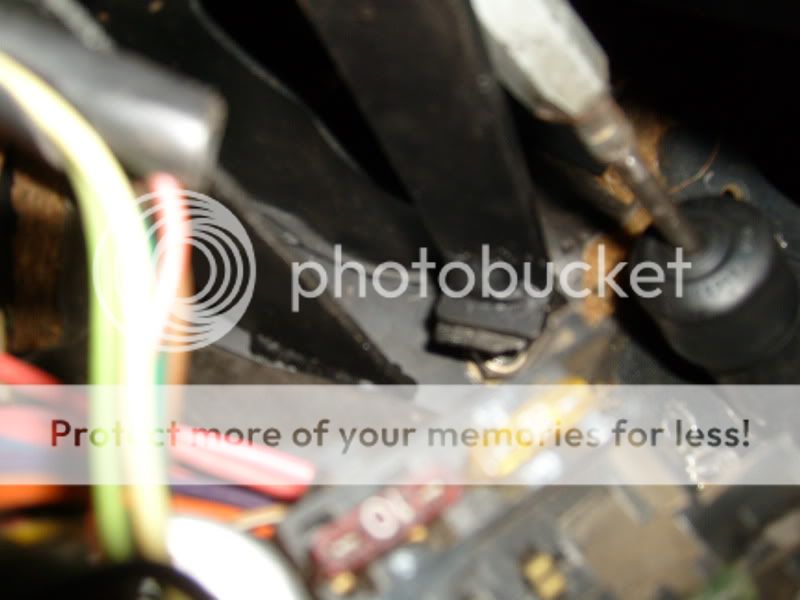
I also added a plate that mounts to the left upper, and lower studs for the brake booster, to aid as a support for the other side of the clutch pivot point
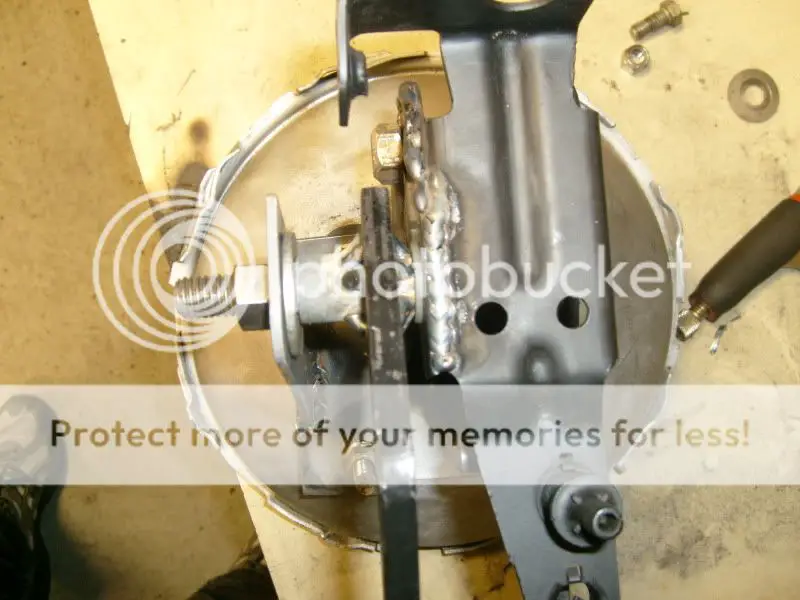
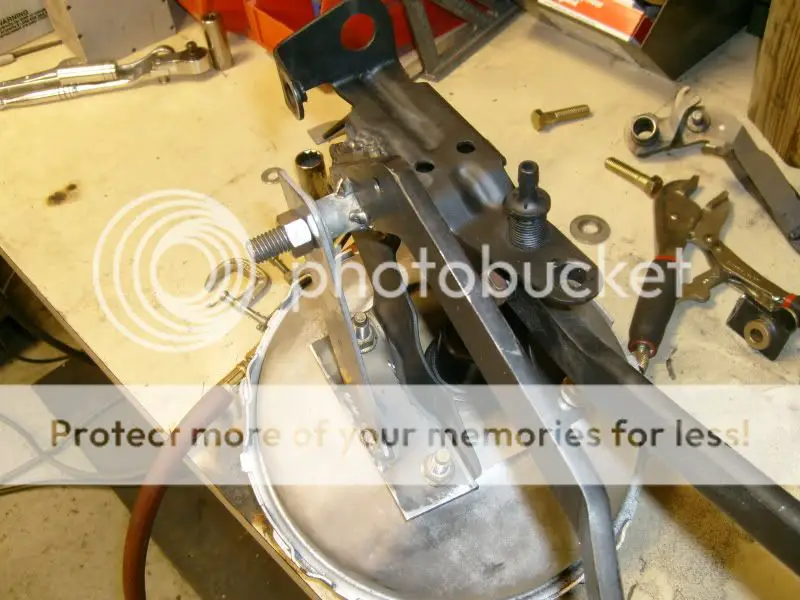
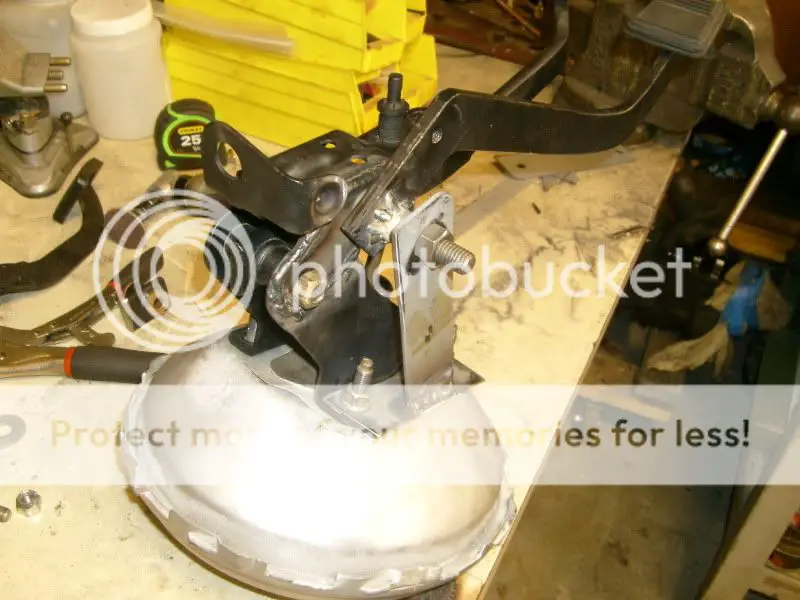
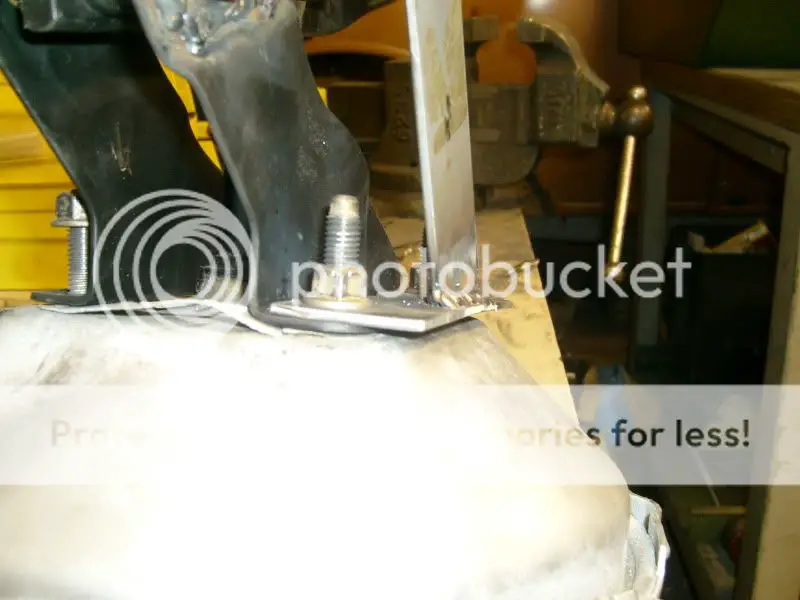
I placed a nylon washer on either side of the clutch pedal to keep binding down to a minimal, then double nutted the new pivot point bolt. then gave everything a fresh coat of spray paint. (the new pivot point bolt is pictured with the hex head placed against the outer support for the clutch pedal but in the car this was reversed with the nuts now sitting on that side as the two nuts interfered with the brake pedal travel.
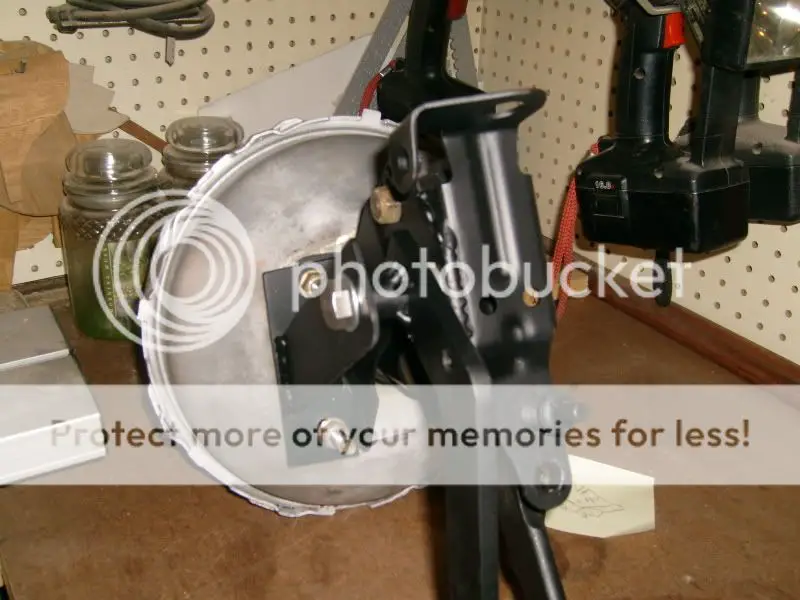
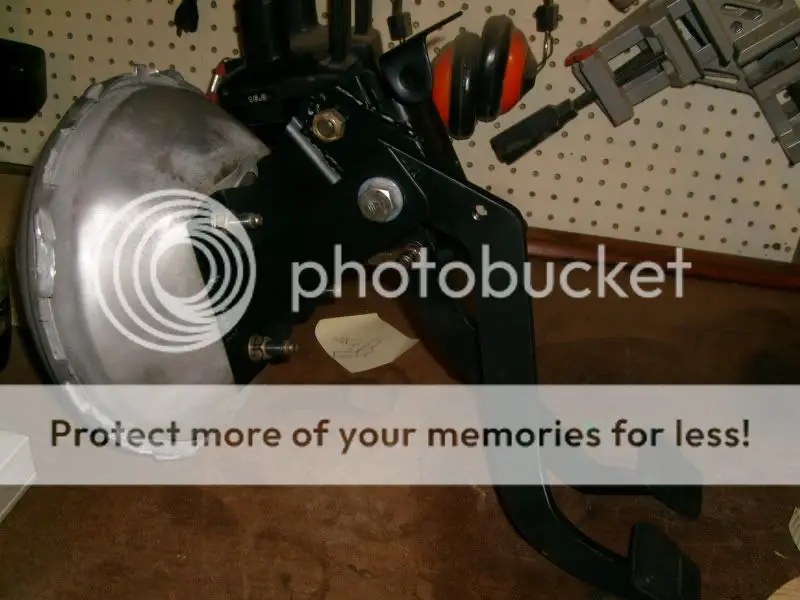
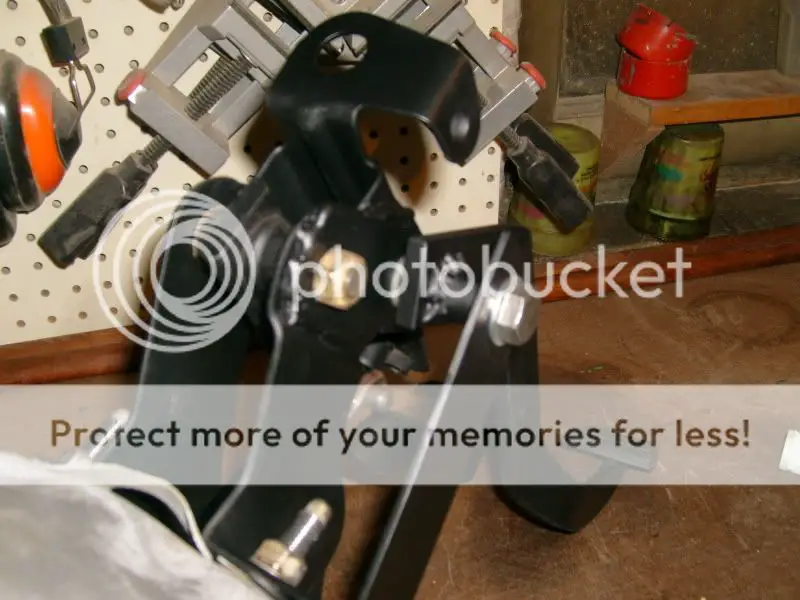
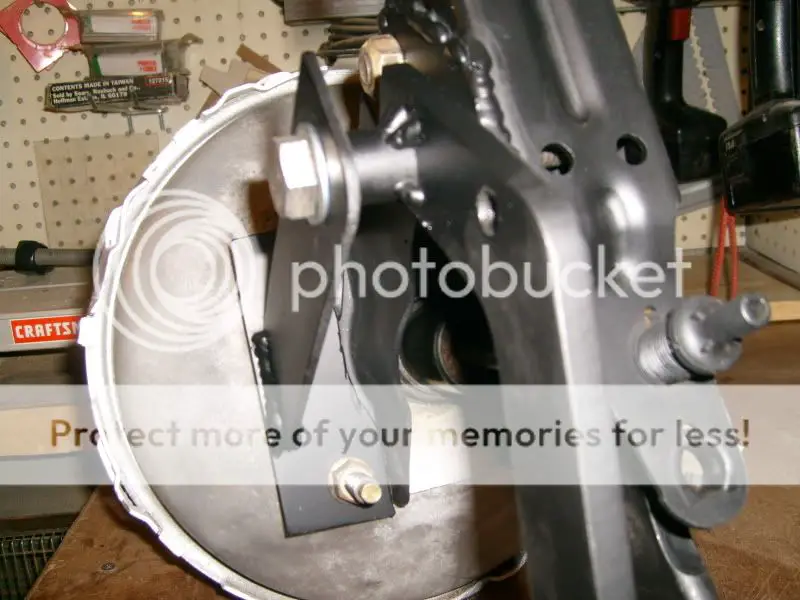
after installing the clutch master cylinder in the car I found I Drilled/marked the holes in the firewall in the wrong location (forgot to measure twice/cut once #-o ) and once it was mounted to the pedal I found it was not aligned with the pedal travel (I removed the brake pedal, booster, gas pedal assembly, and steering column in this process to give me as much room as possible). NOTE you have to notch the left front upper column support to allow for the pivot point of the clutch pedal. (this must be done with the unmodified John B. pedal as well)
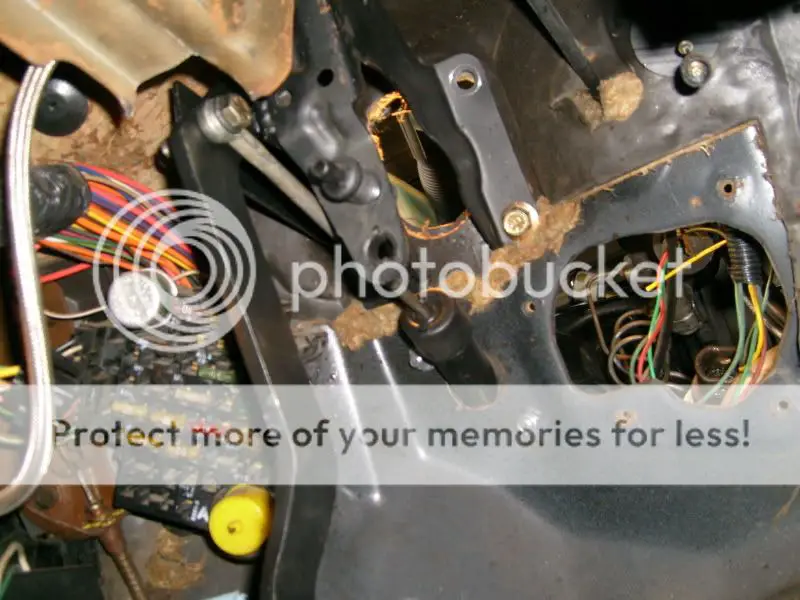
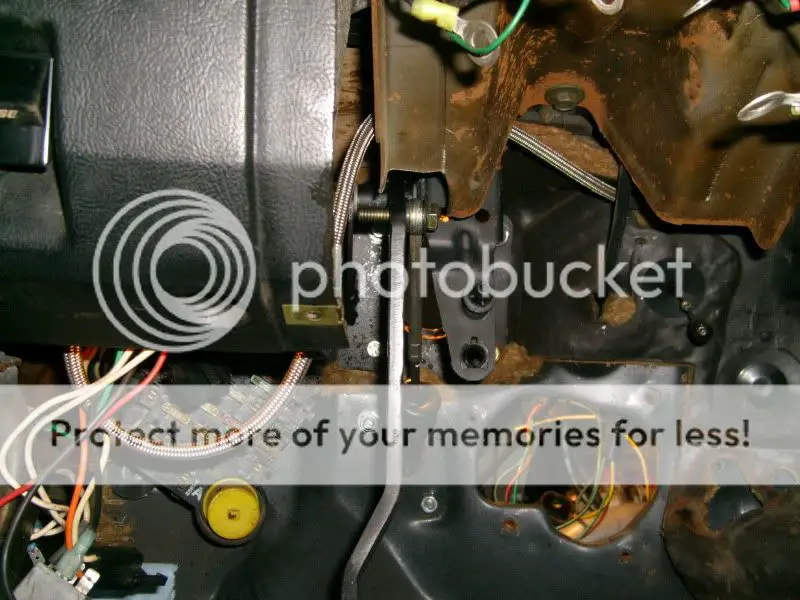
I removed the clutch master, drilled 2 more holes in the correct location and "clocked" the clutch master cylinder into the proper location at which everything was now aligned.
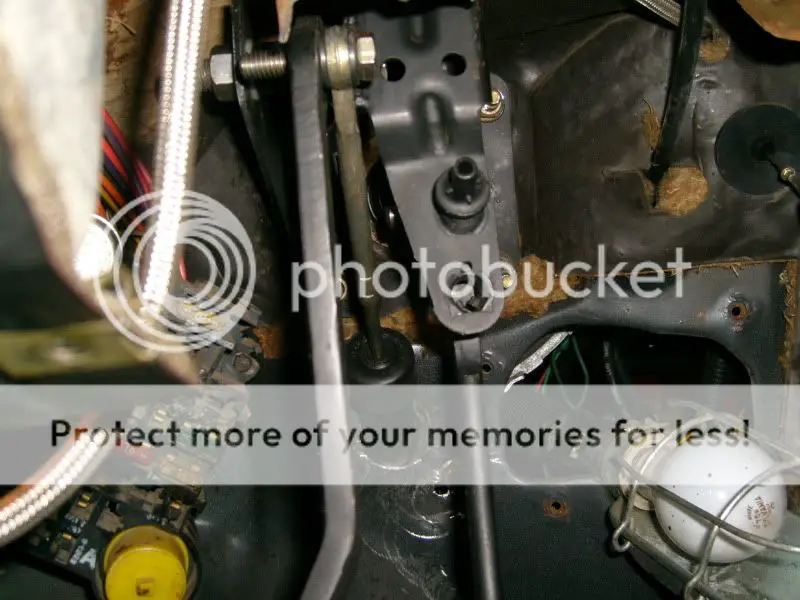
then checked for clutch master travel and found I could bottom out the master with no problems and pedal did not interfere (had more than plenty of room!!) I had sooo much room because pedal height was WAY off!! (not quite sure where I went wrong but I did fail geometry :-k )
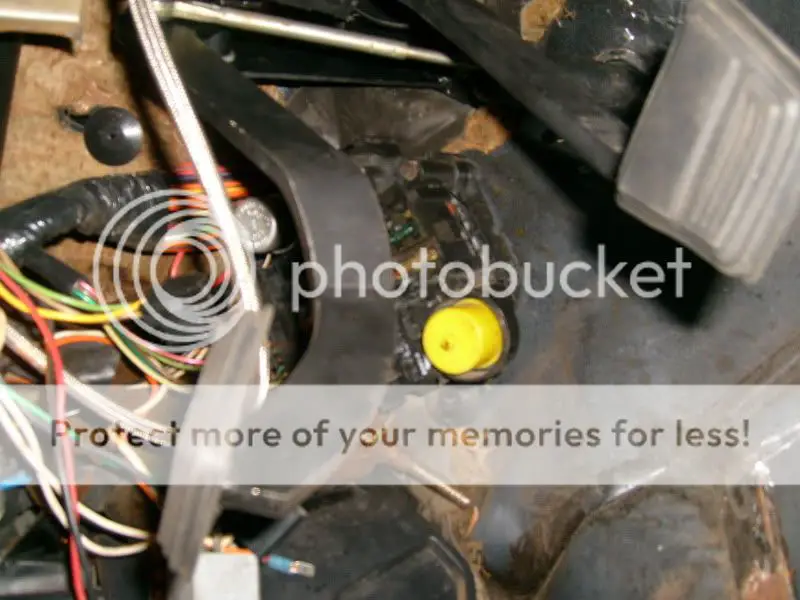
I attempted to make the master adjustable using a heim joint a co-worker gave me, then using a grade 8 bolt (with the head cut off) and a sleeve I used a die to put threads onto the clutch master pushrod.

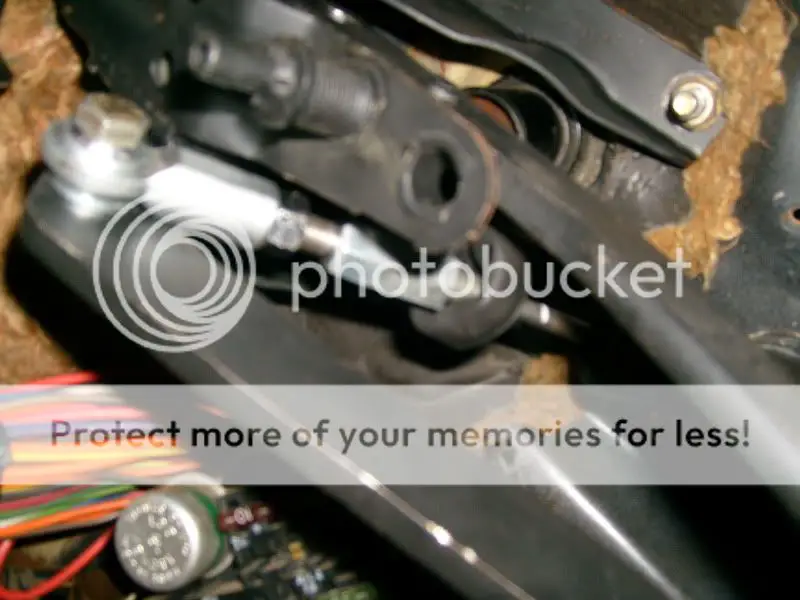
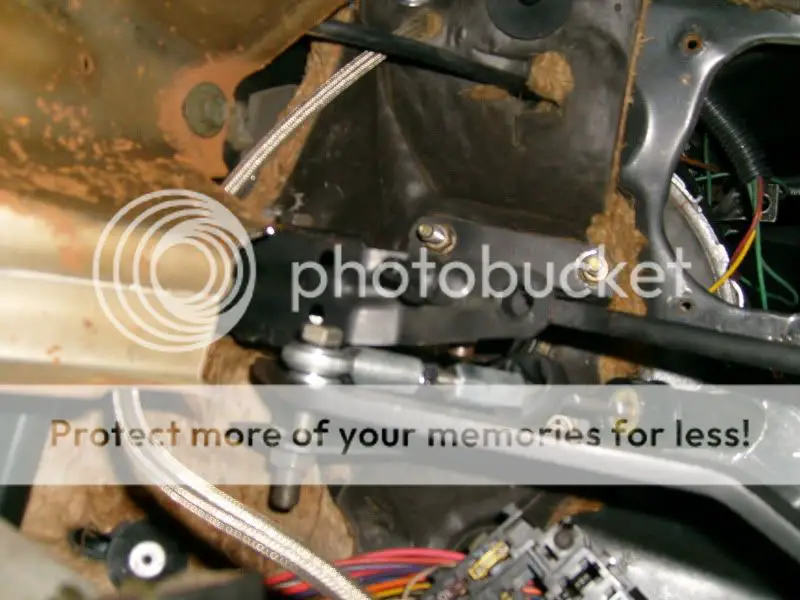
The heim joint head was too thick and caused the push rod to no longer be aligned with the angle of the pedal travel, and was also rubbing in some areas...I reused the sleeve, and took the original eyelid from the clutch master, shortened it by about an inch, and also used a die to put threads on it, I then welded the sleeve to the master side of the pushrod, then placed a jam nut on the eyelid side of the pushrod to make it easy to adjust. Adjusted the pushrod to set pedal height.
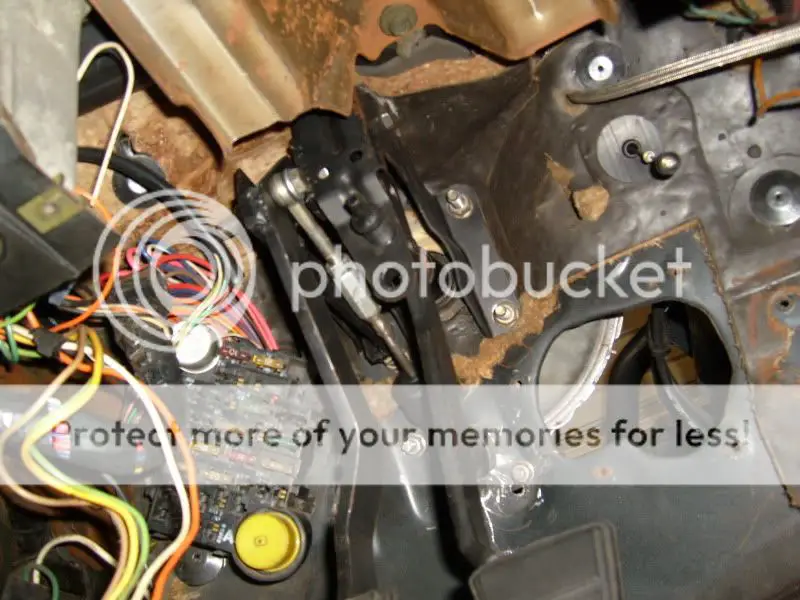
after setting pedal height I measured and installed a pedal stop so that I wasn't overdriving the clutch master set it to 15/16" travel, marked its location and welded it to the clutch pedal. the adjustable "homemade" clutch master allows me to set pedal height/clutch master pushrod stroke. (sorry not the best pic)
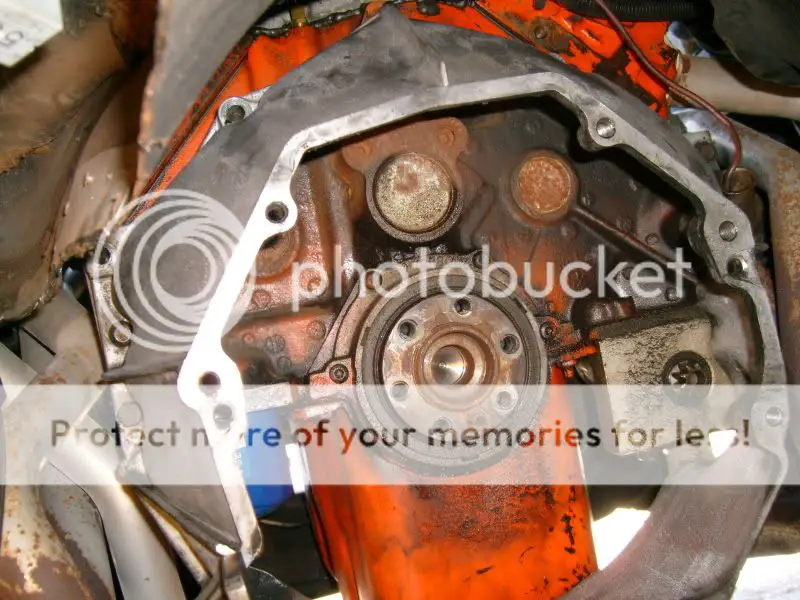
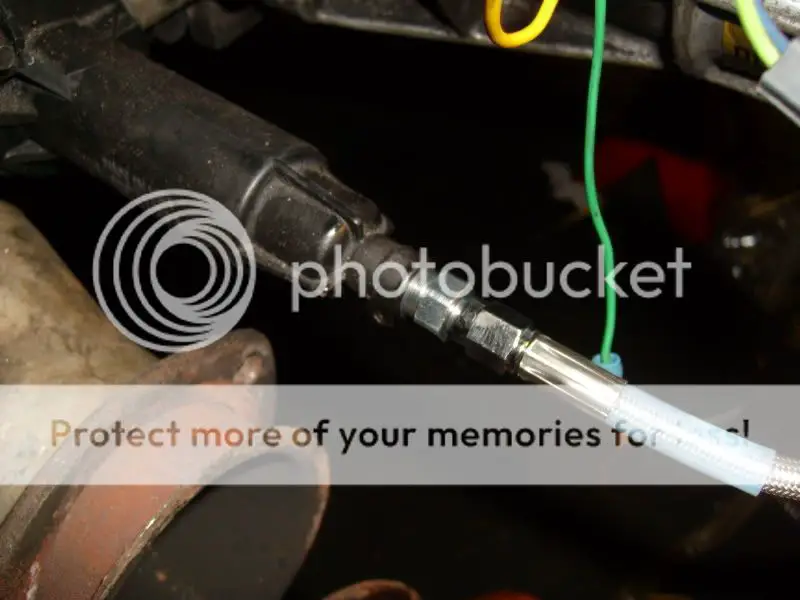
I removed the bell housing from the T56 and mounted it the engine and then mounted the clutch slave to the bell housing, at this point I realized two things: first The factory hydraulic line was not long enough to reach between the clutch master and slave cylinder comfortably so I needed to go longer/aftermarket. and second I found that where the line exited the slave was just too close to the header on the drivers side bank for my liking.
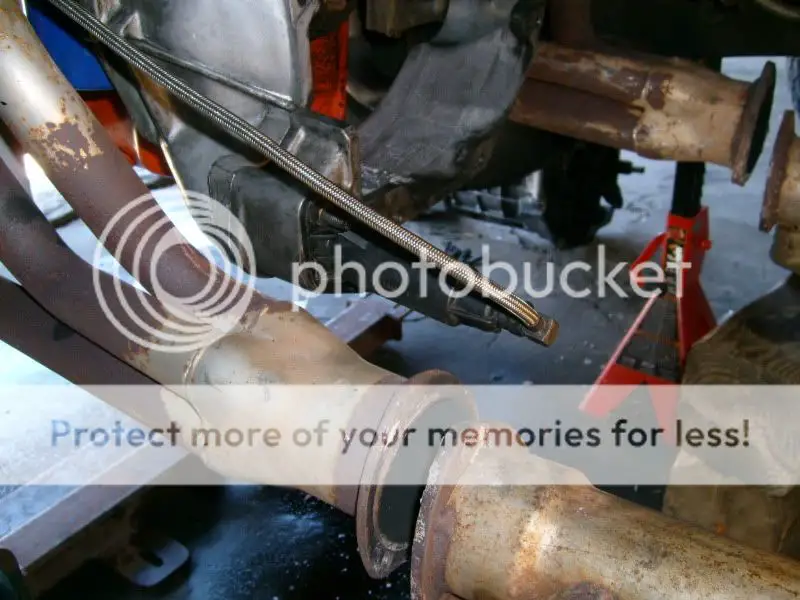
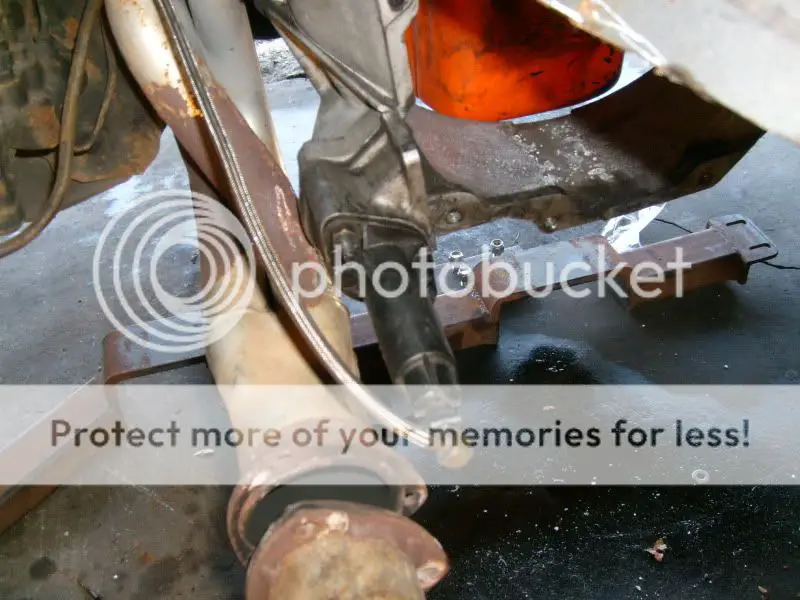
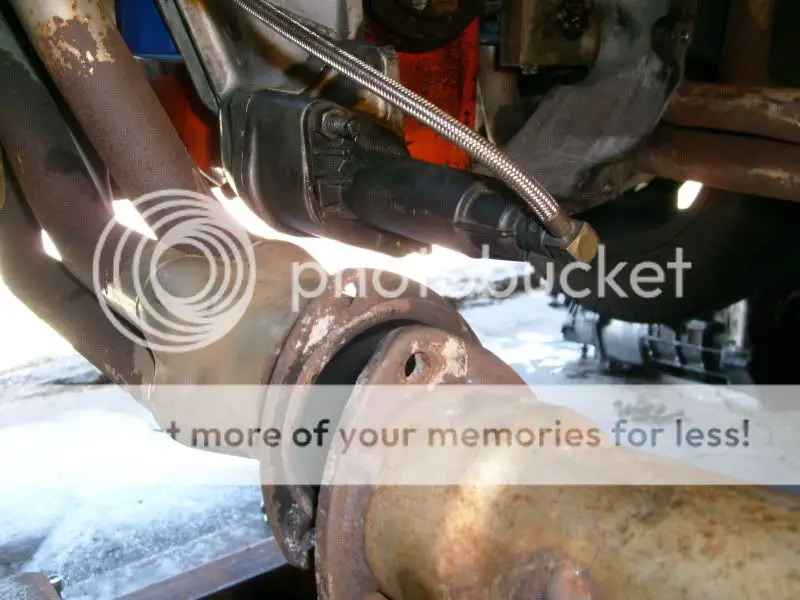

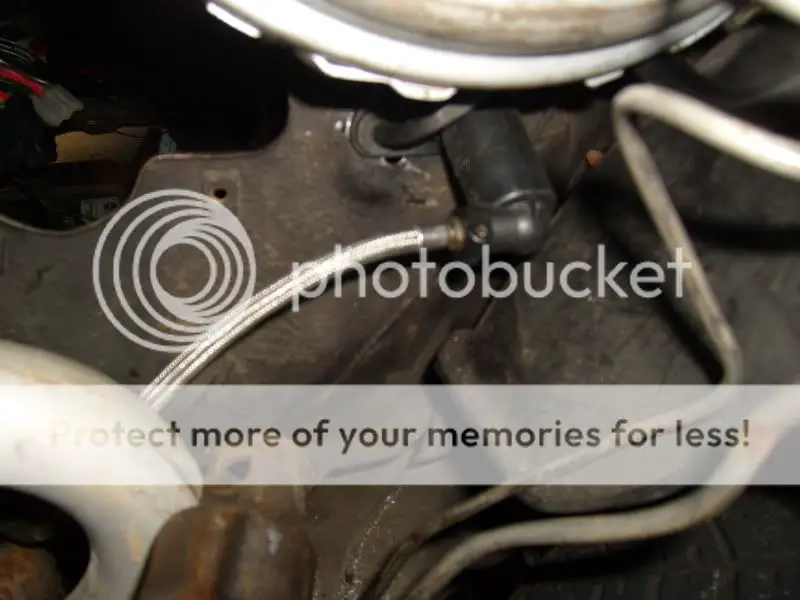
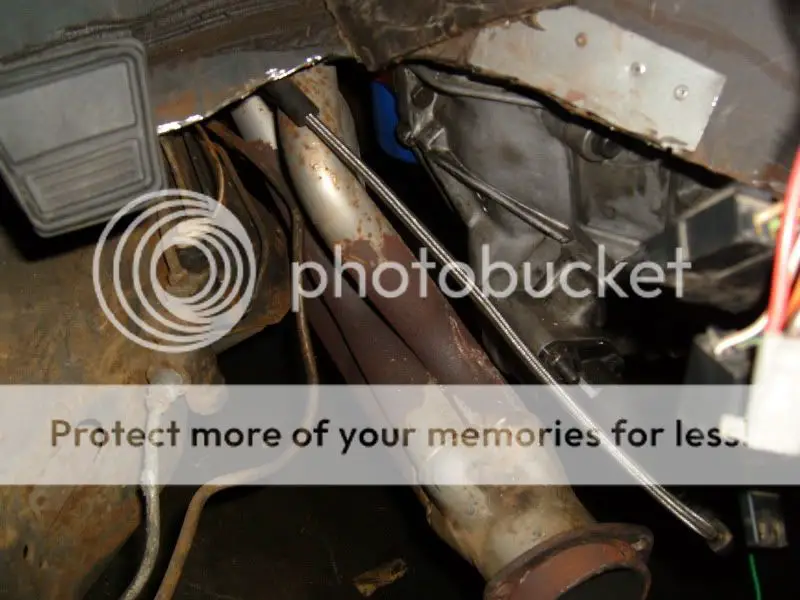
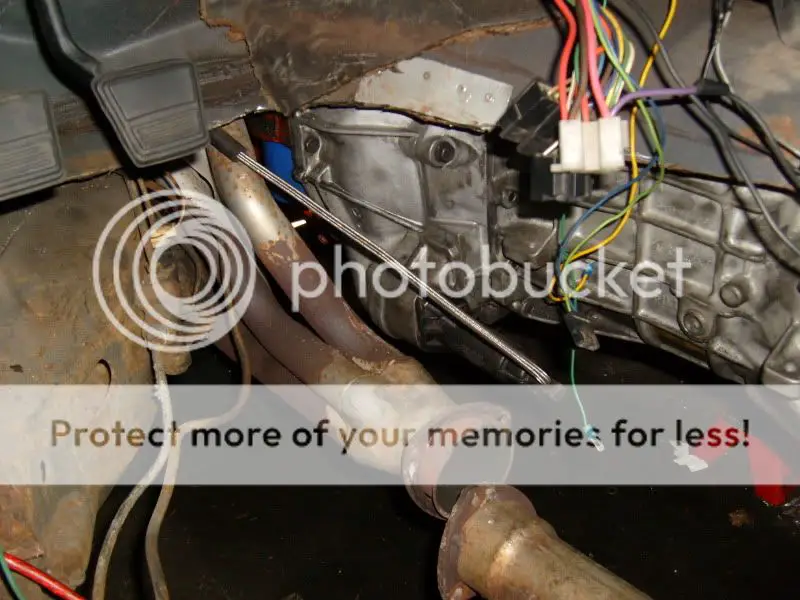
Purchased a 90 degree AN fitting, and AN adapters for the slave and clutch master, and an aftermarket line. I used the hydraulics (master/line/slave) that came with the trans from ebay just for mock up but ended up purchasing a new master, and slave cylinder (with bleeder screw built in it). Bleeding the clutch system was the biggest Pain in the you know what, but with a vacuum pump, and plenty of fluid I finally got it bled....I never want to do that again lol Did I mention I am glad I was also replacing my floor too :mrgreen:
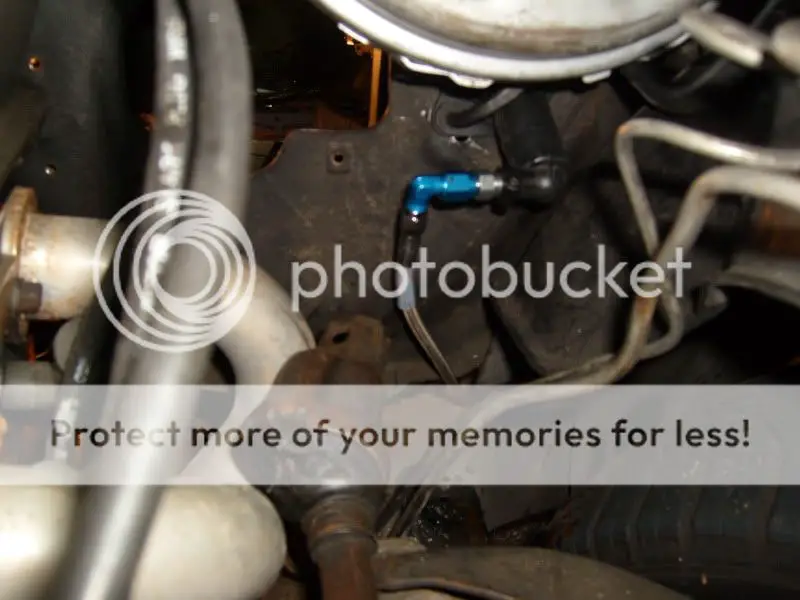
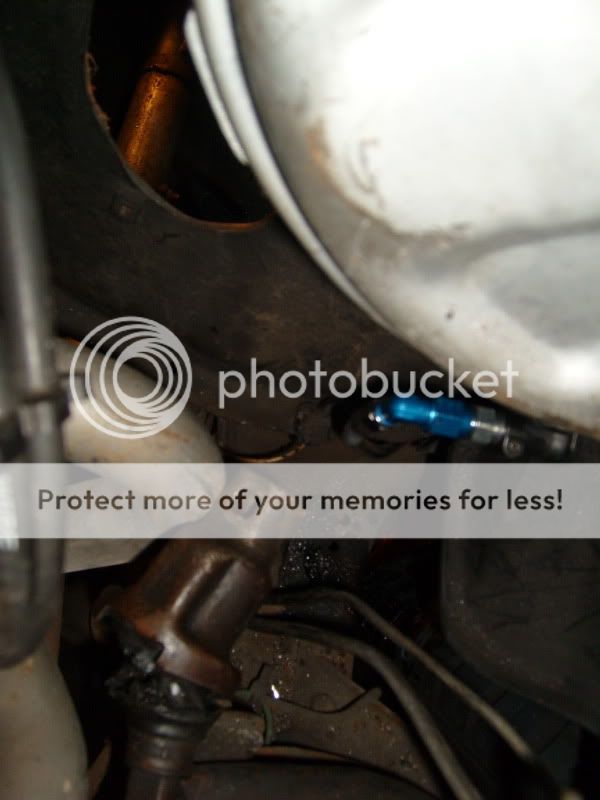
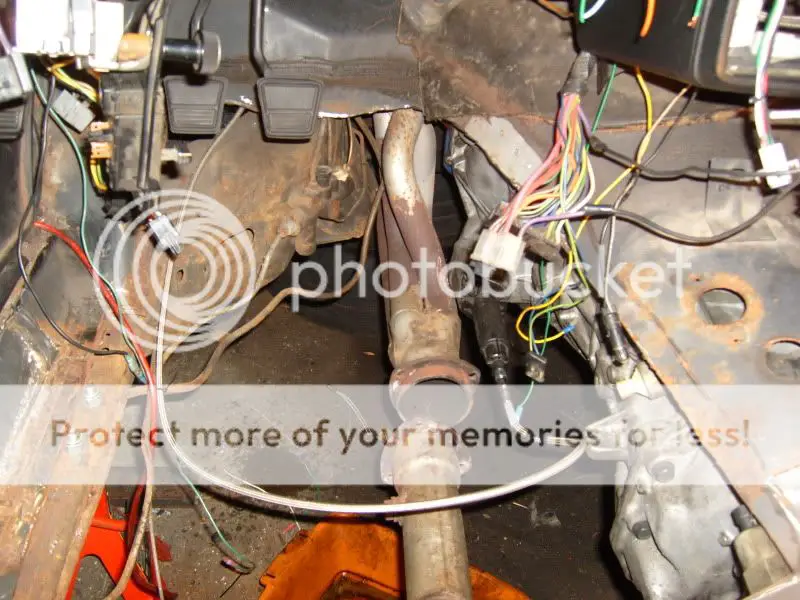
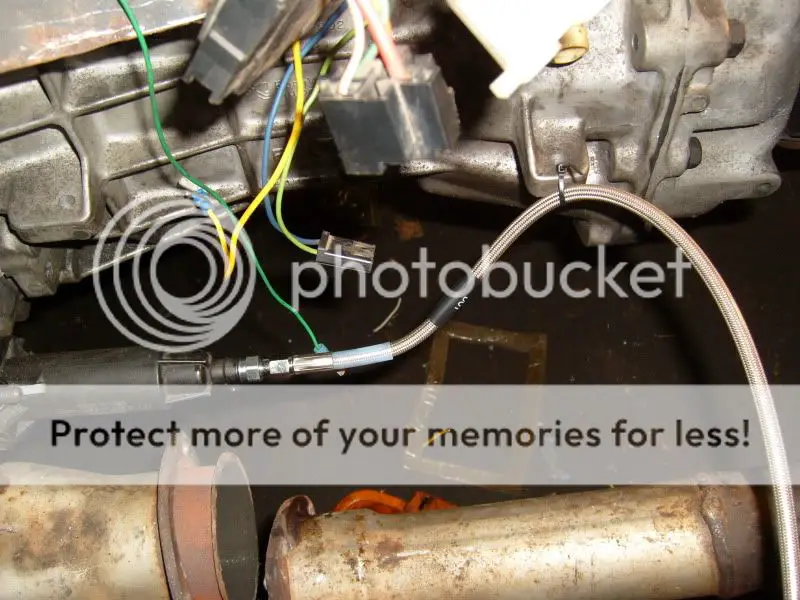
old slave with fitting/new line used for mock up
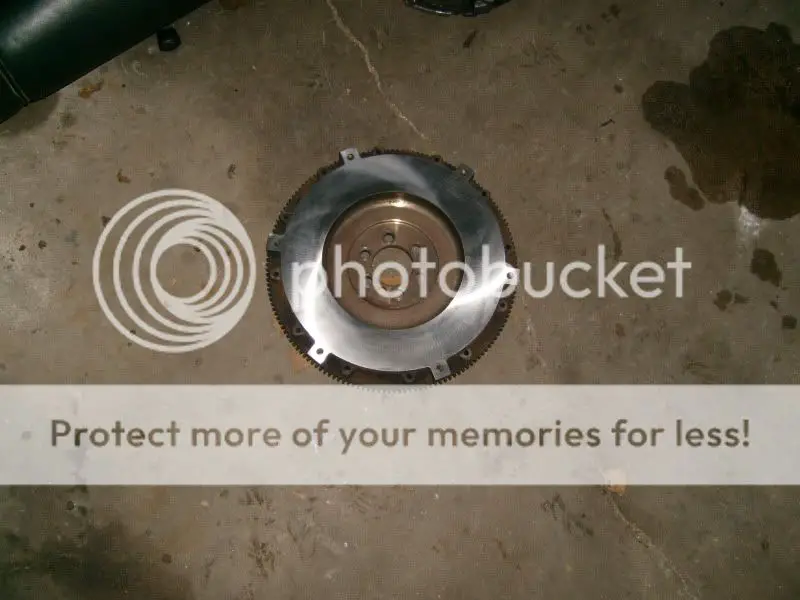
I resurfaced the flywheel that came with the transmission purchase, and replaced the clutch, pressure plate, throw out bearing, and pilot bearing with a kit from SPEC, a stage II LT1 T56 clutch kit.
Cant find any pics of the clutch and pressure plate bummer I know I took some not sure if I saved them or not #-o .
I found I was unable to fit the originally equipped single diaphragm "pancake" brake booster against the firewall with out pinching the clutch fluid feed line right at the clutch master coming from the clutch master reservoir as the diameter of the single diaphragm was too large. So I purchased a monte SS dual diaphragm booster, and brake master cylinder. I then fabbed up some brackets one to hold my fuel isolater for interior fuel psi gauge, and the other to hold the clutch fluid reservoir.
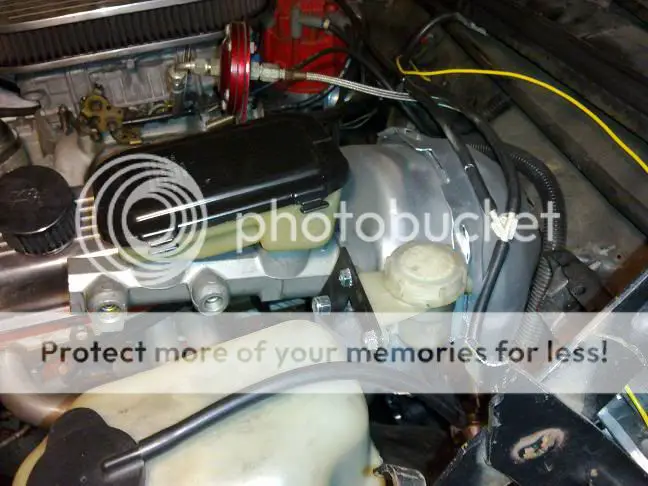
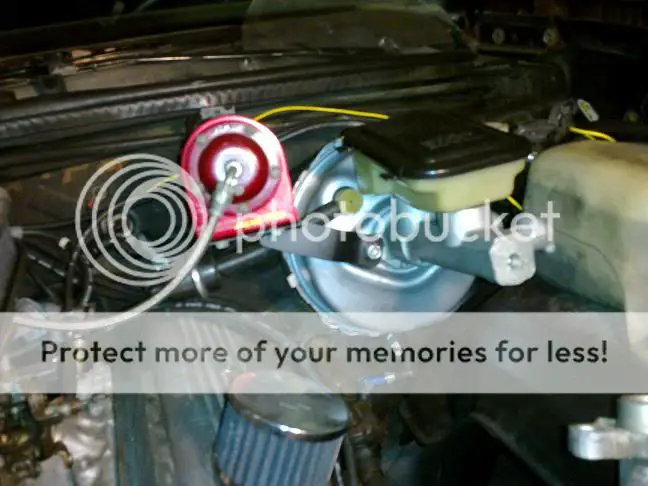
after getting everything in and tight, welding in the new floor you can see pedal height is perfect!!
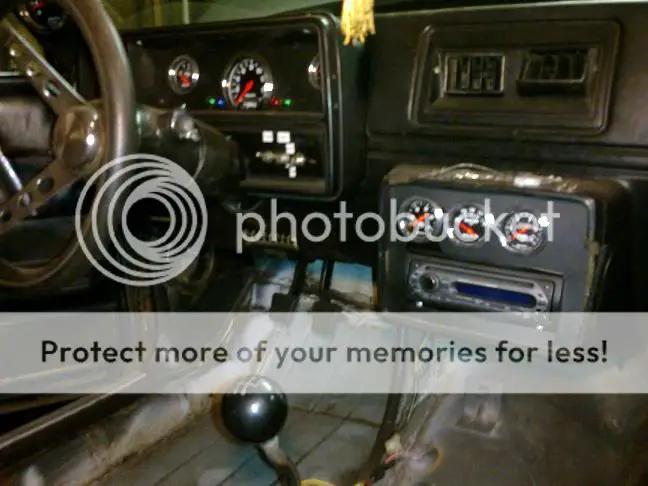
I used the Iceman T56 cross member, and frame extension, I was able to re-use my drive shaft (as I had already done a 700-r4 swap prior). sorry no pics of this.
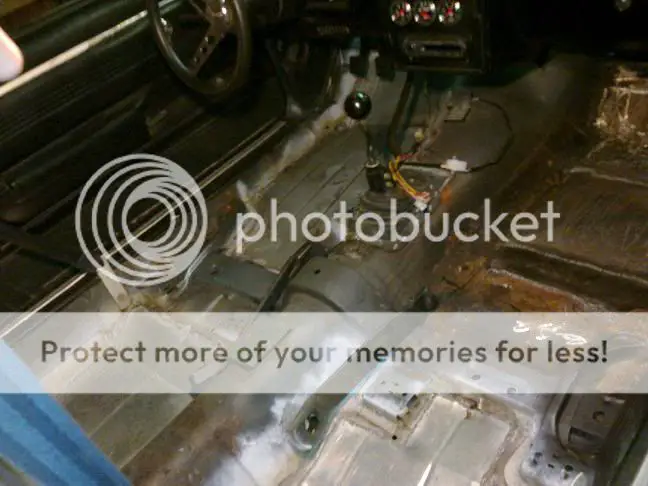
I cut the hole in the floor for the shifter too large so I made a small patch panel, and installed a lower shift boot from a 95 camaro I got off of ebay for 20.00 bucks with small self tapping sheet metal screws. The original shifter came with the trans but had an aftermarket shift knob on it that was hot glued to it because the threads were not right, the previous owner of the transmission cut the shifter down to make a shorter handled shifter (I am assuming) and then attempted to re-tap it....I cut off his mess found a bolt (VW passat axle bolt ha ha) that has the same threads as the shift ball, cut the head off and welded it to the factory shifter.
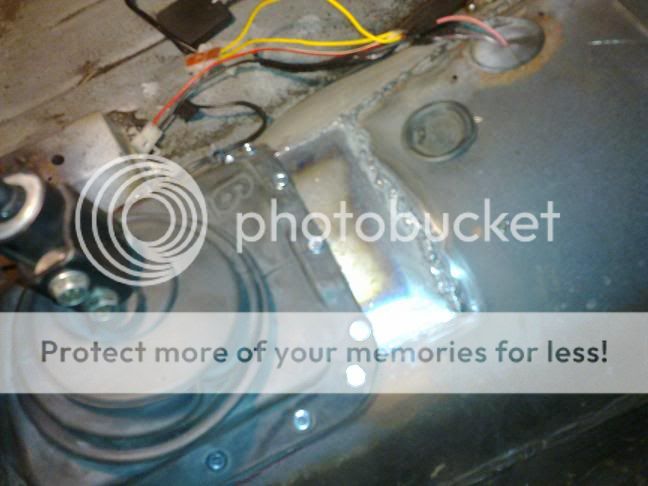
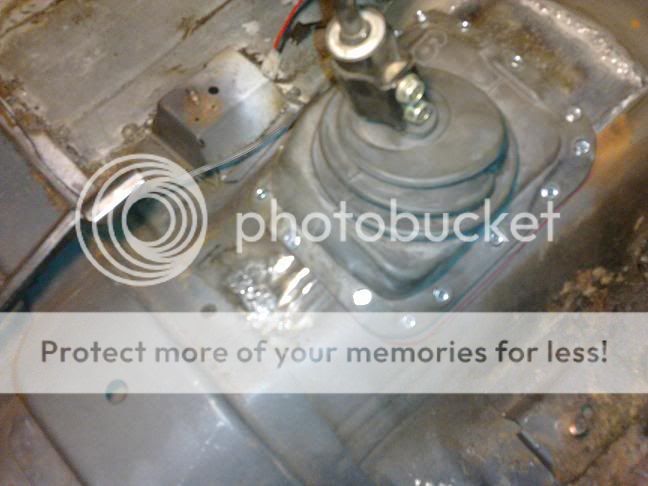
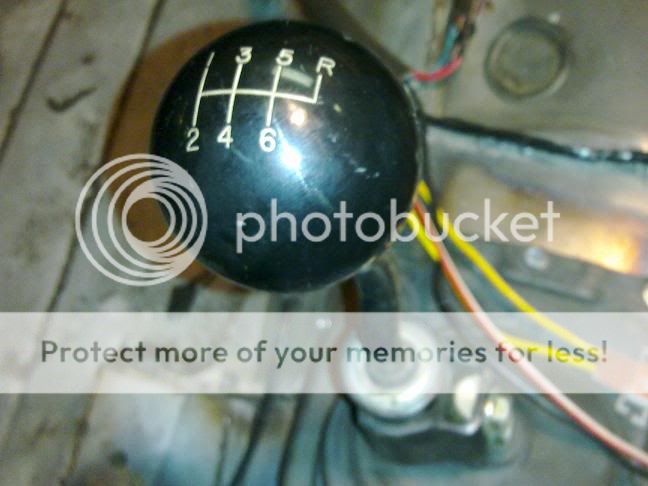
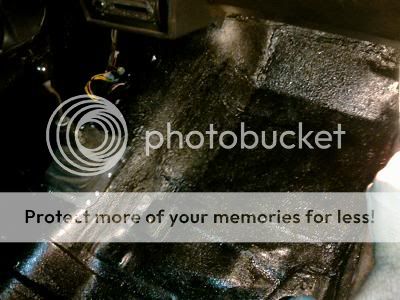
after replacing portions of the floor with 3 patch panels, and re-welding/fixing a botched 4th I seem sealed and painted the floor with herculiner pick up truck bedliner ha ha "cheap mans carpet" lol

I had to replace my Mechanical speedometer with a digital speedometer as this T56 trans has no speedometer cable connection just electrical. Autometer was very cool about this!! I spoke with a woman over the phone and she agreed to allowing me to trade them my mechanical speedometer for the electrical and only had to pay some silly re-stocking fee of $15.00 (that versus the 200.00 price tag is ok with me ha ha they didn't even charge me the difference between the two!! either its a super awesome company!! or some one got fired! lol but either way the speedometer is forever programmable, so there would be no issues if I were to ever change tire size or rear end gear ratio pretty neat!!!
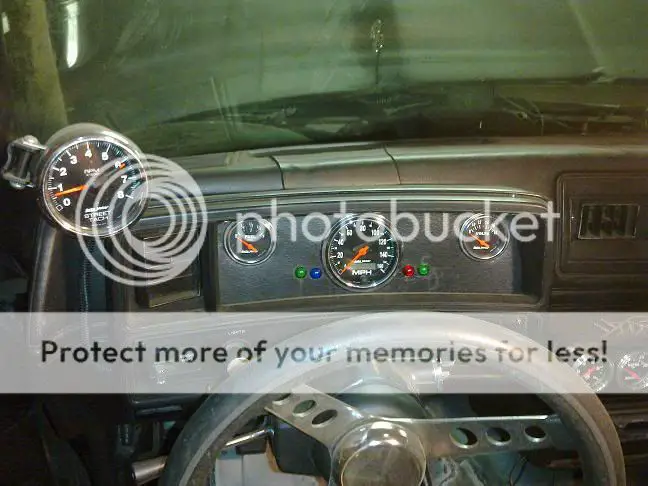
wired in the reverse lock out to my brake light switch so when shifting to reverse I must step on the brake first, wired in the speedometer, and wired in the reverse lights using a pigtail set I purchased off of ebay. sorry no pics of this.
first start up with trans installed, no brakes yet. "click on it to play"
http://youtu.be/uyjsqPRVkTY
http://youtu.be/YJBMzISDq6Q
I then cut off the hanging exhaust (the cross pipe in the "H" was now hitting the T56 crossmember)
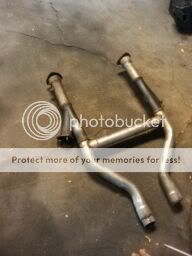
got it off the jack stands, made sure everything was nice and tight, brakes connected, all electrical stuff was plugged in and taken care of I went straight to the exhaust shop, had the manual cut outs re-installed and exhaust connected with another "H" pipe and then went for a ride. cruising around the streets was fun and the transmission shifted nice but seemed some what sloppy I'm sure it has had it's share of abuse and miles on it....On the highway it seemed to lurch up and down in gear, I literally got to drive it about a week before insurance ended and snow began to fall :cry: that following spring I re-insured it and back out on the streets!! I got to drive it another week.....even before the clutch "break in" period I got on it a couple of times (who could resist lol) one night I took this chick for a ride!! being the most awesome person and intelligent person on the planet :^o I decided to try to impress her 8) in the process of a quick 1-2 shift after laying some rubber in my alley all I heard was grinding :-s and never made it into 2nd.... had enough momentum to roll right in front of my garage and reversed into it. I looked over and she had this smile from ear to ear, she had no clue what had just happened so I played it off as Joe cool 8) but on the inside I was ](*,) lol I had just turned 2nd gear into dust!! but never said anything to her ha ha and she was impressed but I can't go into details ha ha :-# .... I soon had it back up on jack stands and the trans out of it in less than 1.5 hours!! something the automatic would of at least taken 4 hours to do!!
out in 1.5 hours and before noon ha ha!!
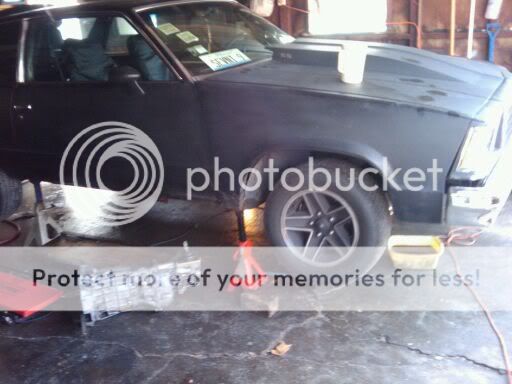
took this shortly after the trans was out and I finished wiring some new toys in!! :twisted:
http://youtu.be/qAyIB973iA4
had the T56 completely rebuilt and 2nd gear replaced by a company because I didn't want to deal with the head ache. After having it rebuilt I enjoyed it all summer long!!! no more lurching on the highway, nice and solid shifts, no play in the shifter, I turn about 1700 rpms with a 235/70/15 tire with 4.10's in 6th on the highway at 70 mph!! and the car is sooooo much fun to drive now!! I wish I would of done this swap a long time ago!! I have put on at least 1000 miles since the rebuild with no issues (other than a tail shaft leak which I think is being caused by my worn rear suspension, it's on the "to do list"). But I really just wanna say a big thanks to this board for all the advice and help, tips, tricks, words of wisdom, and everything else I left out that you have done to help me make this swap happen!!! I couldn't of done it with out this wonderful gearhead family =D> and a big thanks to my friends Eric Waldier and Gerard. I put this post up in hopes that it may just help some one else down the line. If I left anything out let me know and I will revise this thanks for reading and again for all the help.- Shawn
Its funny how replacing a rusty floor turned into a T56 swap ha ha but first things first!! out with the old!! (700-r4 boat anchor lol) and in with the new!!


1997 Firebird T56 trans, shifter, shifter ball, bell housing, clutch, pressure plate, flywheel, pedal assembly, trans mount, hydraulics, F-body T56 crossmember, inspection cover, and drive shaft fresh out of the crate from an ebay buy. 1,525.00 shipped to my place via truck freight not too bad I guess :roll:


installing the John Bzdel "bolt in" pedal:
original pedal basket

need to cut metal pedal pad down to accept smaller rubber pedal pad used for stick shift car applications, pedal bolted in, brake metal pedal pad cut, rubber pads installed on clutch and brake.


Modifying John Bzdel pedal to get the F body geometry and pedal swing/travel:
this was something I went above and beyond to do as the John Bzdel pedal is a bolt in and works just fine!!!, I have heard other people were not satisfied with the release point of the clutch/clutch pedal travel as it had a shorter pedal stroke compared to the factory A/G-body or F-body travel. (I can not confirm or deny this fact as I never installed his clutch pedal and never operated it before I modified it) I wanted more of a stock feel and stroke (based off of what I heard from other members) and since I had an F body pedal assembly that came with the purchase of the T56, I compared the stock clutch pedal of the 1997 F-body to John Bzdel's pedal and modified it and my pedal basket to mimic the F body pedal and fit it as required please see below. (there are other options for adding a clutch pedal to your A/G body such as modifying pedals from a 82'-92' F-body, or adapting a pedal assembly from a factory manual 78-81 A body with angled adapter plates sandwiched between the booster and body to hold a T5 or T56 clutch master, but I went with John Bzdel pedal as it seemed to have the least amount of fabrication needed to be installed and since I had purchased the pedal prior to reading what others thought of it, I just worked with what I had).
after cleaning and painting the booster, and pedal basket assembly I bolted in the pedal with the supplied longer bolt into the brake pedal hinge point, I attached the booster to the pedal basket using washers in between to make up for the sheet metal of the body. I then connected the brake pedal to the booster push rod. This placed the brake pedal at resting pedal position/height.


I then separated the F-body clutch pedal from the F body pedal cluster (came with trans purchase from Ebay) and held it up beside John B's clutch pedal and marked where the F-body pedal pivot point sits. John B's pedal is spot on!! when compared to the F body pedal as far as front to back bends (not side to side as you can see in the pics this is because it is engineered for the A/G body cars) even the clutch master mounting point is dead on!! the pedal is a great product!!


with the John B clutch pedal bolted in and it's pedal pad lined up to the exact height of the brake pedal pad; I inspected where the new pivot point would be needed on the pedal basket, using the mark made from the previous step. At this point I could see I would have to add some metal as there was not enough metal in this location to mount a bolt, so I fabricated a plate that would then provide enough metal for a bolt to sit and still not interfere with brake pedal or other components.

the plate with hole drilled for original mounting point for brake pedal.

plate mocked up.

pedal basket grinded for good conductivity for welding

placed bolt through brake pedal pivot point to hold plate in correct spot and welded.


I then installed a new pivot point on John B's pedal using some left over round stock from a suspension kit my friend had laying around, cut it to match (width including the bronze bushing supplied with John B's pedal) then shortened the pedal to remove the original pivot point, pressed in the pivot point, and laid a few welds for extra insurance.


I also added a plate that mounts to the left upper, and lower studs for the brake booster, to aid as a support for the other side of the clutch pivot point


I placed a nylon washer on either side of the clutch pedal to keep binding down to a minimal, then double nutted the new pivot point bolt. then gave everything a fresh coat of spray paint. (the new pivot point bolt is pictured with the hex head placed against the outer support for the clutch pedal but in the car this was reversed with the nuts now sitting on that side as the two nuts interfered with the brake pedal travel.


after installing the clutch master cylinder in the car I found I Drilled/marked the holes in the firewall in the wrong location (forgot to measure twice/cut once #-o ) and once it was mounted to the pedal I found it was not aligned with the pedal travel (I removed the brake pedal, booster, gas pedal assembly, and steering column in this process to give me as much room as possible). NOTE you have to notch the left front upper column support to allow for the pivot point of the clutch pedal. (this must be done with the unmodified John B. pedal as well)


I removed the clutch master, drilled 2 more holes in the correct location and "clocked" the clutch master cylinder into the proper location at which everything was now aligned.

then checked for clutch master travel and found I could bottom out the master with no problems and pedal did not interfere (had more than plenty of room!!) I had sooo much room because pedal height was WAY off!! (not quite sure where I went wrong but I did fail geometry :-k )


I attempted to make the master adjustable using a heim joint a co-worker gave me, then using a grade 8 bolt (with the head cut off) and a sleeve I used a die to put threads onto the clutch master pushrod.


The heim joint head was too thick and caused the push rod to no longer be aligned with the angle of the pedal travel, and was also rubbing in some areas...I reused the sleeve, and took the original eyelid from the clutch master, shortened it by about an inch, and also used a die to put threads on it, I then welded the sleeve to the master side of the pushrod, then placed a jam nut on the eyelid side of the pushrod to make it easy to adjust. Adjusted the pushrod to set pedal height.

after setting pedal height I measured and installed a pedal stop so that I wasn't overdriving the clutch master set it to 15/16" travel, marked its location and welded it to the clutch pedal. the adjustable "homemade" clutch master allows me to set pedal height/clutch master pushrod stroke. (sorry not the best pic)

I removed the bell housing from the T56 and mounted it the engine and then mounted the clutch slave to the bell housing, at this point I realized two things: first The factory hydraulic line was not long enough to reach between the clutch master and slave cylinder comfortably so I needed to go longer/aftermarket. and second I found that where the line exited the slave was just too close to the header on the drivers side bank for my liking.


Purchased a 90 degree AN fitting, and AN adapters for the slave and clutch master, and an aftermarket line. I used the hydraulics (master/line/slave) that came with the trans from ebay just for mock up but ended up purchasing a new master, and slave cylinder (with bleeder screw built in it). Bleeding the clutch system was the biggest Pain in the you know what, but with a vacuum pump, and plenty of fluid I finally got it bled....I never want to do that again lol Did I mention I am glad I was also replacing my floor too :mrgreen:


old slave with fitting/new line used for mock up

I resurfaced the flywheel that came with the transmission purchase, and replaced the clutch, pressure plate, throw out bearing, and pilot bearing with a kit from SPEC, a stage II LT1 T56 clutch kit.

Cant find any pics of the clutch and pressure plate bummer I know I took some not sure if I saved them or not #-o .
I found I was unable to fit the originally equipped single diaphragm "pancake" brake booster against the firewall with out pinching the clutch fluid feed line right at the clutch master coming from the clutch master reservoir as the diameter of the single diaphragm was too large. So I purchased a monte SS dual diaphragm booster, and brake master cylinder. I then fabbed up some brackets one to hold my fuel isolater for interior fuel psi gauge, and the other to hold the clutch fluid reservoir.


after getting everything in and tight, welding in the new floor you can see pedal height is perfect!!

I used the Iceman T56 cross member, and frame extension, I was able to re-use my drive shaft (as I had already done a 700-r4 swap prior). sorry no pics of this.
I cut the hole in the floor for the shifter too large so I made a small patch panel, and installed a lower shift boot from a 95 camaro I got off of ebay for 20.00 bucks with small self tapping sheet metal screws. The original shifter came with the trans but had an aftermarket shift knob on it that was hot glued to it because the threads were not right, the previous owner of the transmission cut the shifter down to make a shorter handled shifter (I am assuming) and then attempted to re-tap it....I cut off his mess found a bolt (VW passat axle bolt ha ha) that has the same threads as the shift ball, cut the head off and welded it to the factory shifter.


after replacing portions of the floor with 3 patch panels, and re-welding/fixing a botched 4th I seem sealed and painted the floor with herculiner pick up truck bedliner ha ha "cheap mans carpet" lol


I had to replace my Mechanical speedometer with a digital speedometer as this T56 trans has no speedometer cable connection just electrical. Autometer was very cool about this!! I spoke with a woman over the phone and she agreed to allowing me to trade them my mechanical speedometer for the electrical and only had to pay some silly re-stocking fee of $15.00 (that versus the 200.00 price tag is ok with me ha ha they didn't even charge me the difference between the two!! either its a super awesome company!! or some one got fired! lol but either way the speedometer is forever programmable, so there would be no issues if I were to ever change tire size or rear end gear ratio pretty neat!!!

wired in the reverse lock out to my brake light switch so when shifting to reverse I must step on the brake first, wired in the speedometer, and wired in the reverse lights using a pigtail set I purchased off of ebay. sorry no pics of this.
first start up with trans installed, no brakes yet. "click on it to play"
http://youtu.be/uyjsqPRVkTY
http://youtu.be/YJBMzISDq6Q
I then cut off the hanging exhaust (the cross pipe in the "H" was now hitting the T56 crossmember)

got it off the jack stands, made sure everything was nice and tight, brakes connected, all electrical stuff was plugged in and taken care of I went straight to the exhaust shop, had the manual cut outs re-installed and exhaust connected with another "H" pipe and then went for a ride. cruising around the streets was fun and the transmission shifted nice but seemed some what sloppy I'm sure it has had it's share of abuse and miles on it....On the highway it seemed to lurch up and down in gear, I literally got to drive it about a week before insurance ended and snow began to fall :cry: that following spring I re-insured it and back out on the streets!! I got to drive it another week.....even before the clutch "break in" period I got on it a couple of times (who could resist lol) one night I took this chick for a ride!! being the most awesome person and intelligent person on the planet :^o I decided to try to impress her 8) in the process of a quick 1-2 shift after laying some rubber in my alley all I heard was grinding :-s and never made it into 2nd.... had enough momentum to roll right in front of my garage and reversed into it. I looked over and she had this smile from ear to ear, she had no clue what had just happened so I played it off as Joe cool 8) but on the inside I was ](*,) lol I had just turned 2nd gear into dust!! but never said anything to her ha ha and she was impressed but I can't go into details ha ha :-# .... I soon had it back up on jack stands and the trans out of it in less than 1.5 hours!! something the automatic would of at least taken 4 hours to do!!
out in 1.5 hours and before noon ha ha!!

took this shortly after the trans was out and I finished wiring some new toys in!! :twisted:
http://youtu.be/qAyIB973iA4
had the T56 completely rebuilt and 2nd gear replaced by a company because I didn't want to deal with the head ache. After having it rebuilt I enjoyed it all summer long!!! no more lurching on the highway, nice and solid shifts, no play in the shifter, I turn about 1700 rpms with a 235/70/15 tire with 4.10's in 6th on the highway at 70 mph!! and the car is sooooo much fun to drive now!! I wish I would of done this swap a long time ago!! I have put on at least 1000 miles since the rebuild with no issues (other than a tail shaft leak which I think is being caused by my worn rear suspension, it's on the "to do list"). But I really just wanna say a big thanks to this board for all the advice and help, tips, tricks, words of wisdom, and everything else I left out that you have done to help me make this swap happen!!! I couldn't of done it with out this wonderful gearhead family =D> and a big thanks to my friends Eric Waldier and Gerard. I put this post up in hopes that it may just help some one else down the line. If I left anything out let me know and I will revise this thanks for reading and again for all the help.- Shawn


