|
I converted my
Malibu to manual brakes last August (2000). Take a look at the
pictures that I have attached, and try to follow along with my
rambling directions. As you noted, insuring that the push rod
could not fall out was a primary concern. Some Malibus were sold
new with manual brakes, but I have never seen one in a junk yard
or otherwise, and the parts are no longer available from GM.
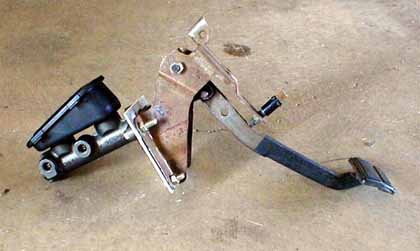
The first thing I did was buy a manual master cylinder at the
local Car Quest auto parts store. Next I made a firewall support
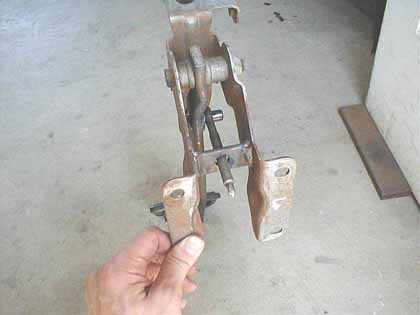
plate out of 1/8" aluminum. I used the holes in the firewall
as a template. This part gets sandwiched between the Master
cylinder and the brake pedal bracket. You can see this part in
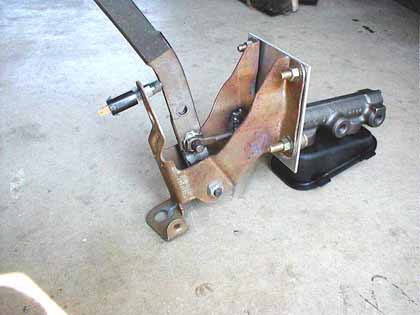
pictures 1, 2, and 4. The next step was to move the pushrod pivot
pin on the brake pedal up to the existing hole that is closer to
the brake pedal pivot. In picture 2 you can see the pushrod pivot
pin in the new location. The open hole in the brake pedal arm was
the old location that is used for power brakes. To move the pivot
pin I used a grinder to remove the factory peening. I then welded
the pin in its new location. Once this pin is moved you can bolt
everything together in preparation for measuring the length for
the pushrod. To make a pushrod, I took my old vacuum booster
and carefully broke the plastic away from around the pushrod until
the pushrod could be removed. This pushrod will be too long.
With the brake pedal, support plate, and master cylinder bolted
together, measure the distance from the pushrod pivot pin to the
piston in the master cylinder. Cut the pushrod off about 1/8"
longer. I then inserted the push rod to check the length more
accurately. Grind, or cut the master cylinder end of the
push rod until the pushrod fits well between the brake pedal and
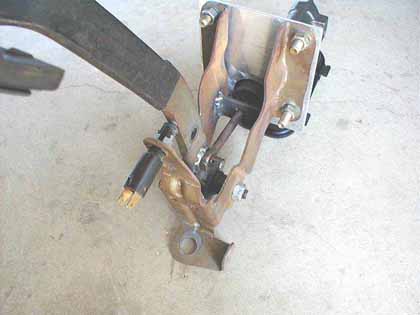
the master cylinder piston. The next thing I did was cut a
piece of 1" wide by 1/8" thick steel to serve as a
pushrod guide. I drilled a 1/2" hole for the push rod to pass
through. I inserted this piece into the brake pedal bracket and
inserted the pushrod through the 1/2" hole. You can see the
pushrod guide in pictures 3 and 5. You can also see the cut down
pushrod. I then bolted the entire assembly together again. If the
pushrod guide is positioned properly, the pushrod never actually
touches the guide. I then welded the guide in. |