first off i will give a little rundown of whats going on. ive been reading and slowly working on doing this swap since about last christmas. there was alot of unanswered questions that i had, not sure whether they were truly unanswered or i was just too lazy to dig deep enough to find the answers, lol. mostly to do with certain fitment issues, such as crossmember and oil pan clearances, motor mounts, headers, etc etc. so basically i found out what i could and went at it head on, and hopefully some people out there can learn from what ive done
to start, the car is a 79 malibu 2 door. a $700 car. basically a cheap chassis for me to hack up and beat on to get the swap done so i know what to do properly in a few years when i feel like dropping the cash on a nice bodied malibu, basically using the car is a guinea pig. stock ls1 out of a 2001 trans am, 97 corvette heads. i freshened up the shortblock with a quick hone, new rings and bearings, and arp rod bolts. the engine also has a double roller timing chain, a ported oil pump, and a ported throttle body. i will be using a 4l60e with a fresh rebuild
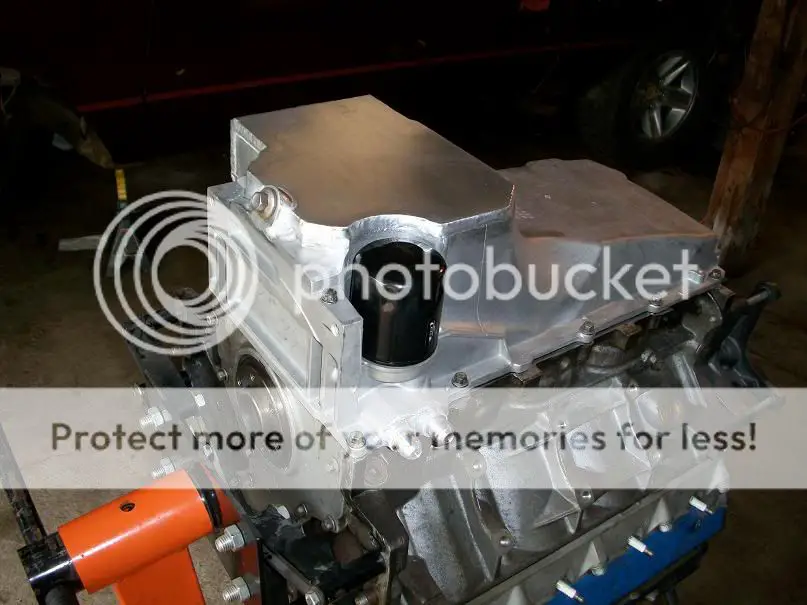
my biggest concerns were the oil pan and the headers. i decided to use a truck pan, and since a stock truck pan hangs far too low below the crossmember i had my good friend who runs his own shop modify the oil pan, here are some pictures of the oil pan

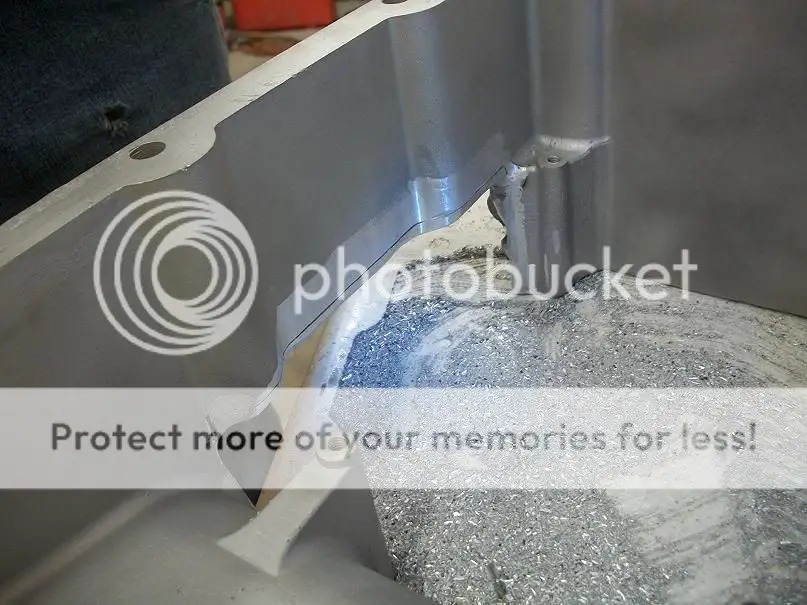
the inside of the pan, he ground all edges down smooth and welded seams inside and out
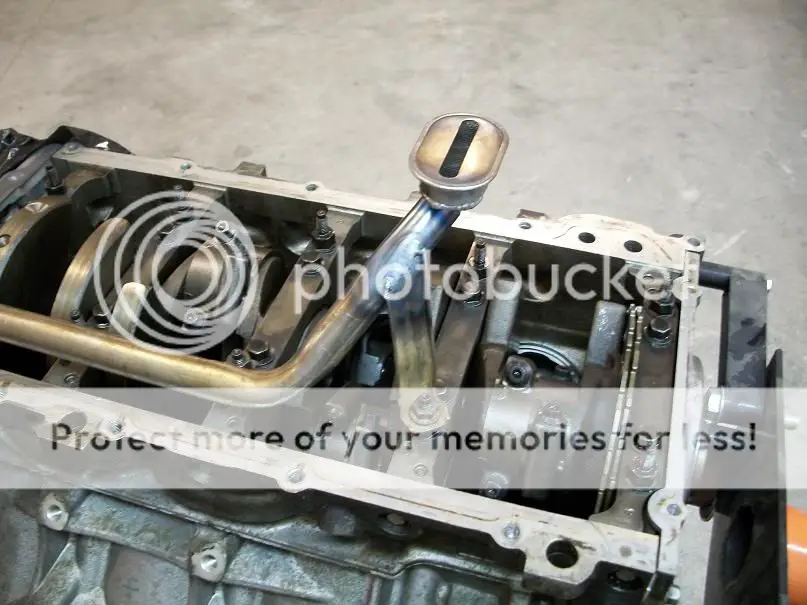
had to modify the pickup tube as well, should fit nicely
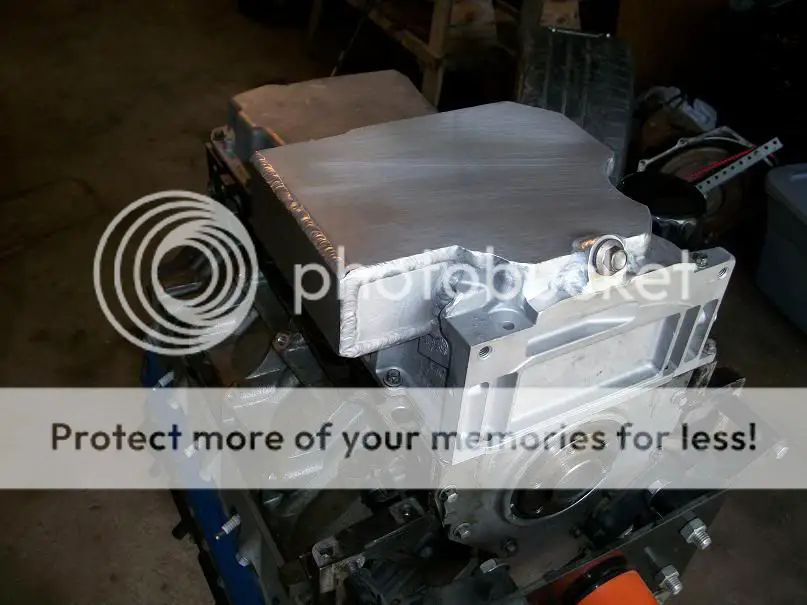
the finished product with my main toy in the background, 11 sec camaro

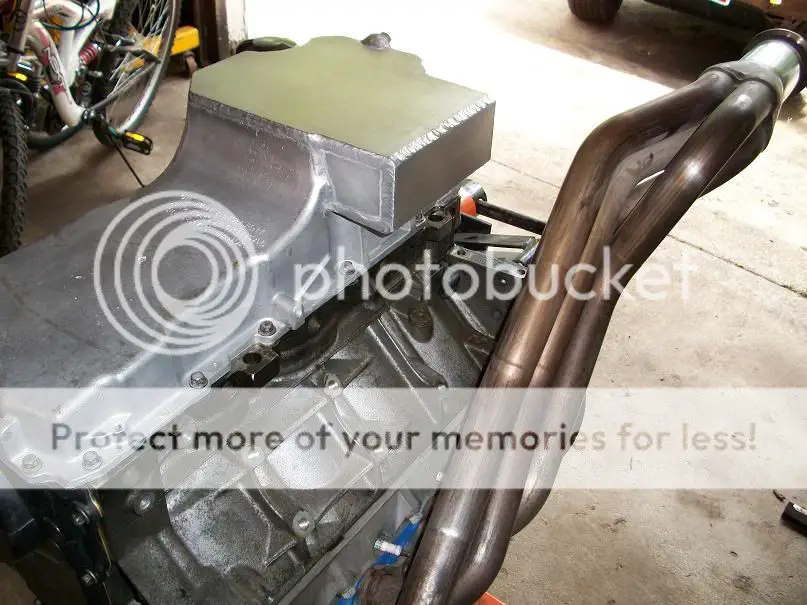
i also had him weld -8AN fittings on the oil line feed and return, a 90* fitting comes close to the header but will work just fine
oil pan to header clearance
the only issue i had with the pan, the corner of the kick out was a little too wide to clear the crossmember. all i had to do was just get some different angles on the motor and transmission and it slipped right in. the only reason why this was a problem was the fact that my engine hoist was hitting the bumper and couldnt push the engine back any farther
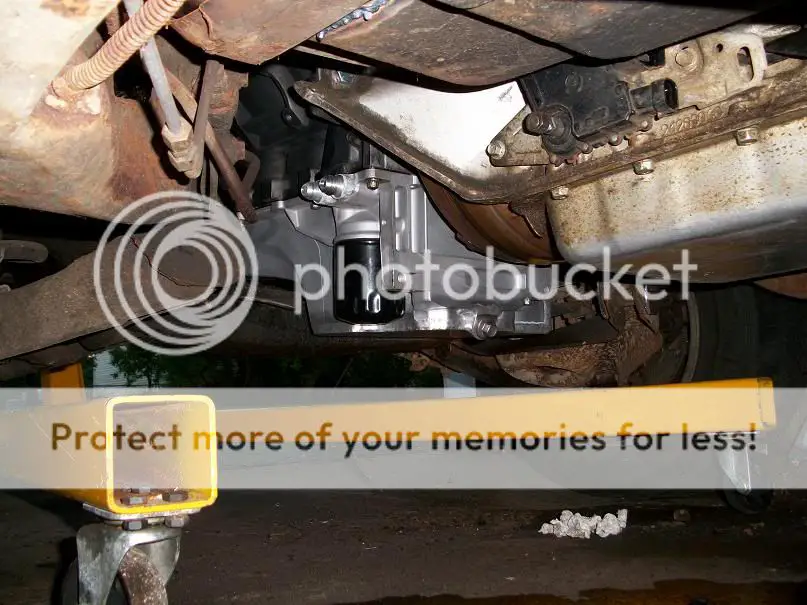
as you can see the clearance turned out perfectly, i am very happy with it
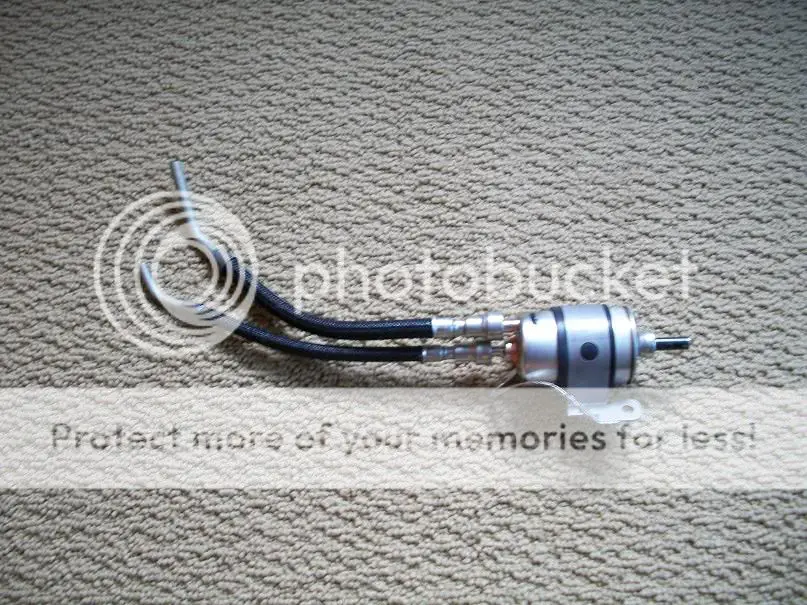
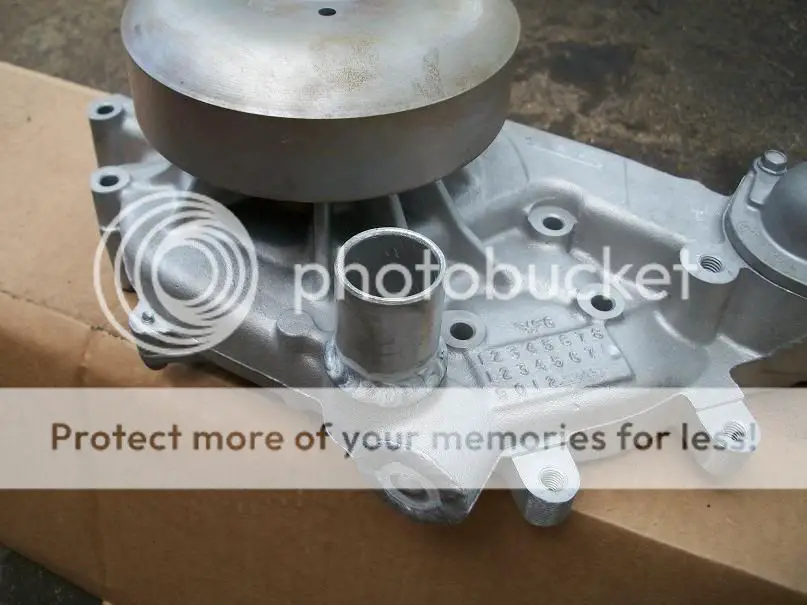
i got a truck water pump for cheap so i had it sandblasted and had him move the water neck from the truck position to the f-body position
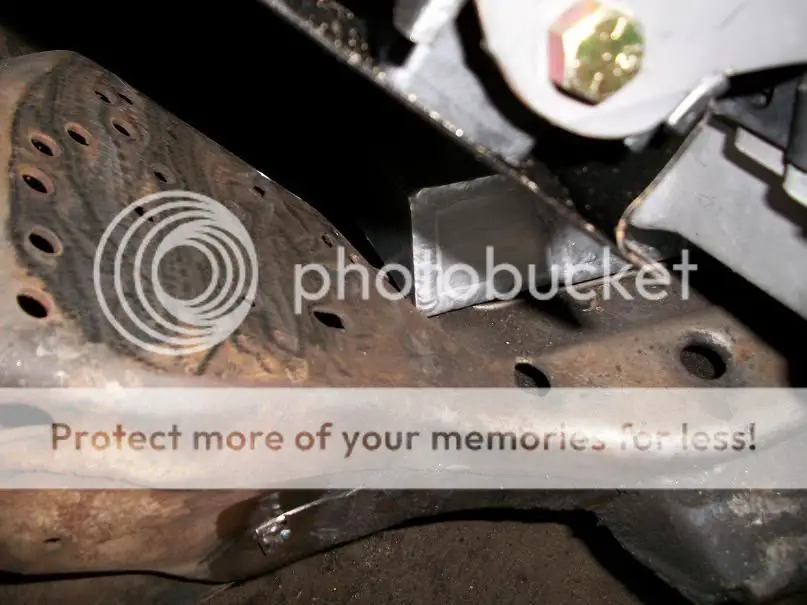
on to the next issue. header to frame/a-arm mount. before i even tried putting the headers in from what ive read the a-arm mount gets in the way alot, so i just went ahead and trimmed it a bit to save from putting a big dent in my headers, here you can see where i made the cut

where the headers hit the frame

a better view of where the clearance issue is. you can also see a better view of the cut a-arm mount and how close the new edge comes to the bolt hole, but im confident there is enough support still left in that bracket to not cause any problems

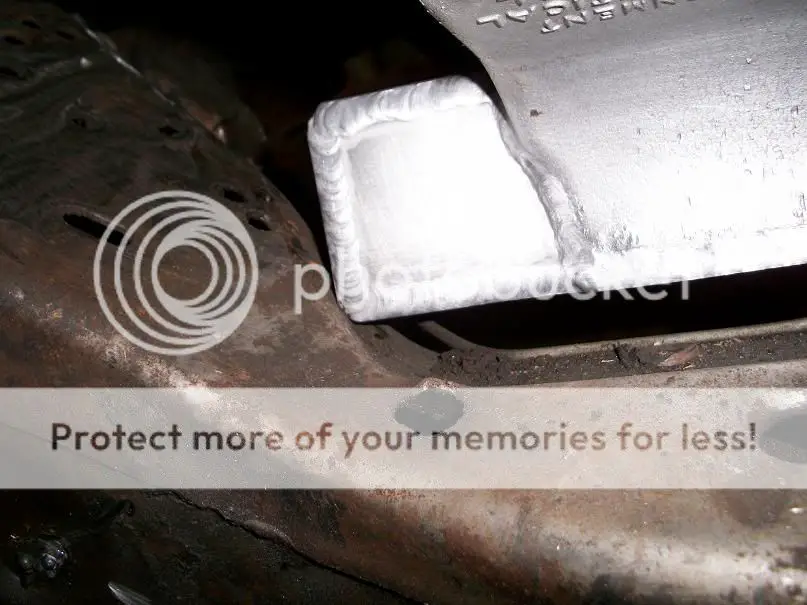
i just ground down the frame a bit in that spot and the headers will fit fine. the better way to do it would be to cut a small notch out of the frame. i do suggest cutting the dog ears off the transmission before you put it in to make the header install a million times easier
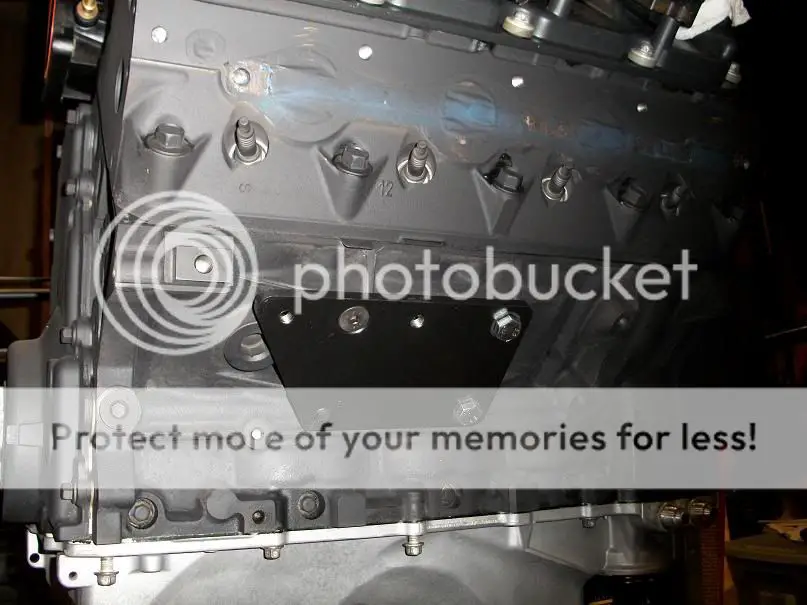
i used transdapt engine mount conversion kit that worked fairly well, but the bolt holes in the plate were very tight and it was slightly a PITA to get them on but it wasnt horriblel, i would suggest drilling out all holes with the next size bigger drillbit to give the plates a little more wiggle room. i used the chevy clamshell style mounts since i had a set of brand new ones laying around.
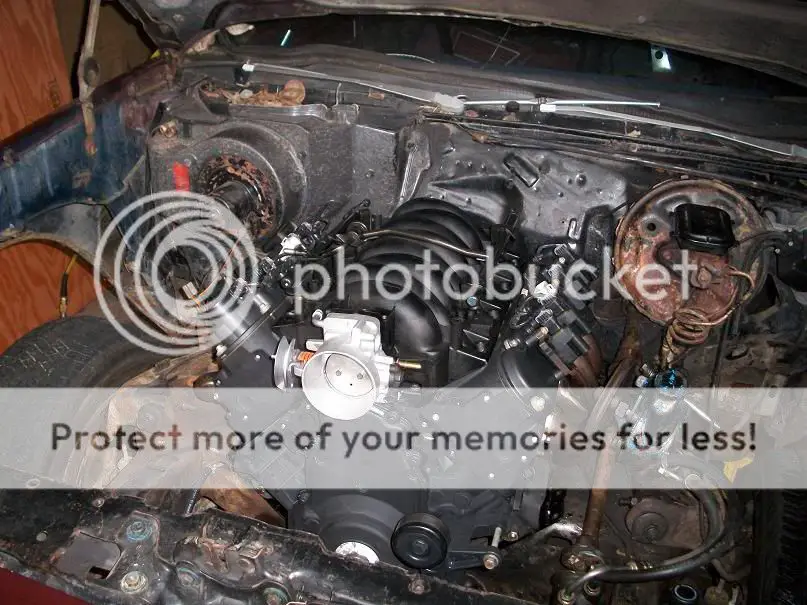
i have about a day into dropping the motor in, cutting and grinding the frame, taking headers in and out, etc etc, not too terribly shabby. the rest of the swap should be pretty straightforward. ill probably have to get my driveshaft cut and balanced. figure out what accesories i want to run (i wont be running AC or power steering so it may be difficult to find and accesory system to fit, but thats another story) getting my injectors, getting a harness, etc etc
all in all the swap wasnt TOO horrible. all questions comments and constructive criticism welcome")
to start, the car is a 79 malibu 2 door. a $700 car. basically a cheap chassis for me to hack up and beat on to get the swap done so i know what to do properly in a few years when i feel like dropping the cash on a nice bodied malibu, basically using the car is a guinea pig. stock ls1 out of a 2001 trans am, 97 corvette heads. i freshened up the shortblock with a quick hone, new rings and bearings, and arp rod bolts. the engine also has a double roller timing chain, a ported oil pump, and a ported throttle body. i will be using a 4l60e with a fresh rebuild
my biggest concerns were the oil pan and the headers. i decided to use a truck pan, and since a stock truck pan hangs far too low below the crossmember i had my good friend who runs his own shop modify the oil pan, here are some pictures of the oil pan
the inside of the pan, he ground all edges down smooth and welded seams inside and out
had to modify the pickup tube as well, should fit nicely
the finished product with my main toy in the background, 11 sec camaro
i also had him weld -8AN fittings on the oil line feed and return, a 90* fitting comes close to the header but will work just fine
oil pan to header clearance
the only issue i had with the pan, the corner of the kick out was a little too wide to clear the crossmember. all i had to do was just get some different angles on the motor and transmission and it slipped right in. the only reason why this was a problem was the fact that my engine hoist was hitting the bumper and couldnt push the engine back any farther
as you can see the clearance turned out perfectly, i am very happy with it
i got a truck water pump for cheap so i had it sandblasted and had him move the water neck from the truck position to the f-body position
on to the next issue. header to frame/a-arm mount. before i even tried putting the headers in from what ive read the a-arm mount gets in the way alot, so i just went ahead and trimmed it a bit to save from putting a big dent in my headers, here you can see where i made the cut
where the headers hit the frame
a better view of where the clearance issue is. you can also see a better view of the cut a-arm mount and how close the new edge comes to the bolt hole, but im confident there is enough support still left in that bracket to not cause any problems
i just ground down the frame a bit in that spot and the headers will fit fine. the better way to do it would be to cut a small notch out of the frame. i do suggest cutting the dog ears off the transmission before you put it in to make the header install a million times easier
i used transdapt engine mount conversion kit that worked fairly well, but the bolt holes in the plate were very tight and it was slightly a PITA to get them on but it wasnt horriblel, i would suggest drilling out all holes with the next size bigger drillbit to give the plates a little more wiggle room. i used the chevy clamshell style mounts since i had a set of brand new ones laying around.
i have about a day into dropping the motor in, cutting and grinding the frame, taking headers in and out, etc etc, not too terribly shabby. the rest of the swap should be pretty straightforward. ill probably have to get my driveshaft cut and balanced. figure out what accesories i want to run (i wont be running AC or power steering so it may be difficult to find and accesory system to fit, but thats another story) getting my injectors, getting a harness, etc etc
all in all the swap wasnt TOO horrible. all questions comments and constructive criticism welcome