Manual brakes+++UPDATE++w/more pics

Wile E

Dragway Regular
Aug 11, 2003
1,075
0
0
Central WISC
I've been watching the manual brake post here and on other sites very closely because I'm doing the same thing. I've seen alot of the same questions keep popping up (including some by me) and I thought some pictures may help clarify things. I'm not a brake guru. I hoped to have this finished up this weekend, but been called into work a few times. So here's what I've got so far.....Moderaters..this may belong in the technical section, please move it if necessary.
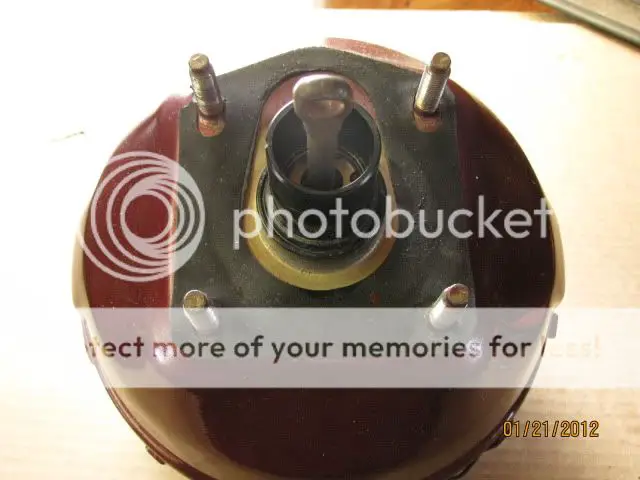
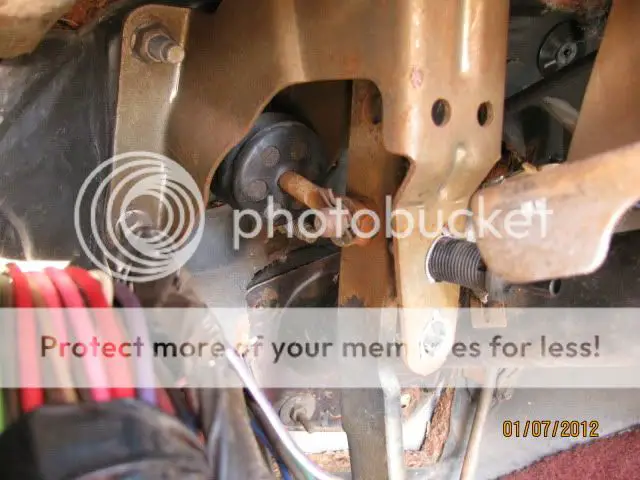
Here's the brake peddle from my parts car with power brakes, the upper hole (above the pushrod stud) is the hole thats needed for the manual brake pushrod to have the proper leverage.
brakes001.jpg

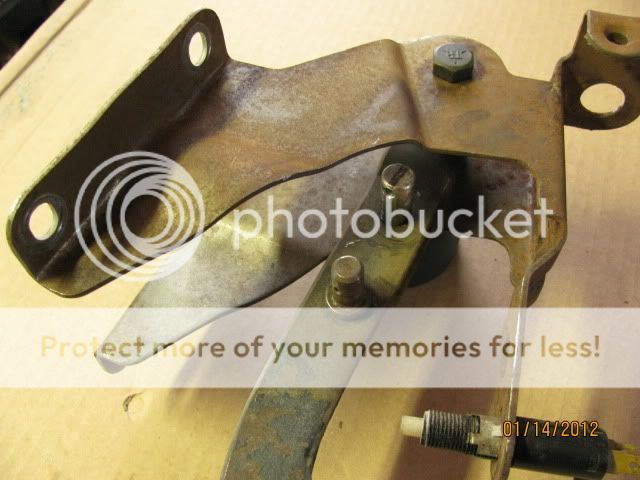
Here's my brake peddle with the new stud pressed in (I added a bit of loctite for peace of mind) The old power brake stud could be removed, I left it.
Brakeairdam008.jpg


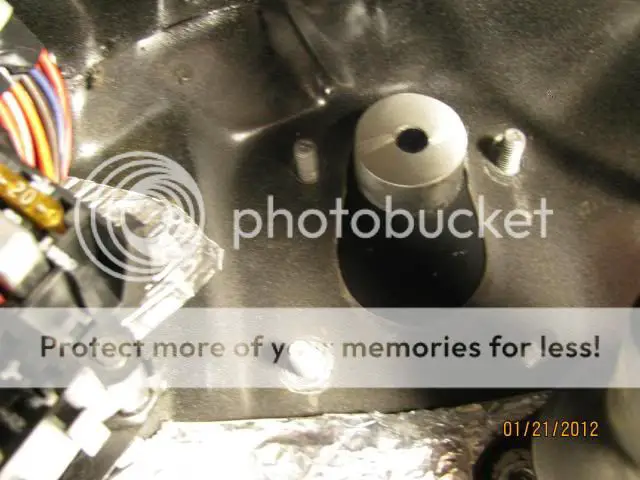
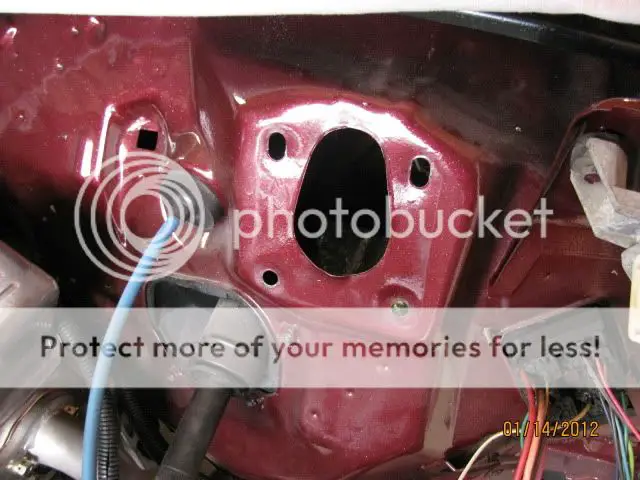
Opening left in firewall after removing booster
Brakeairdam001.jpg

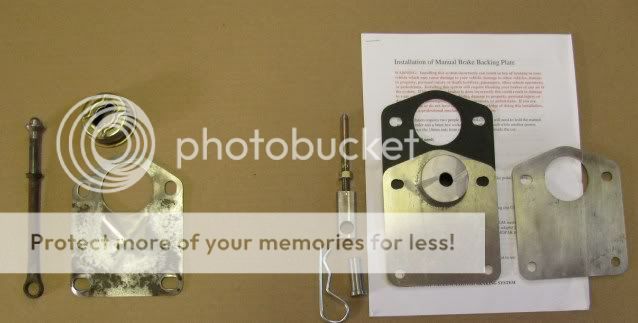
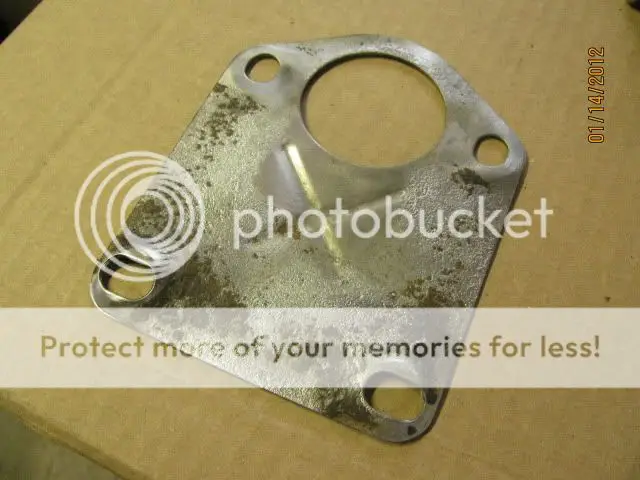
Here is the adapter plate I had intended to use from a manual brake s10. Notice how the mounting holes are distorted from the bolt torque.
Brakeairdam003.jpg

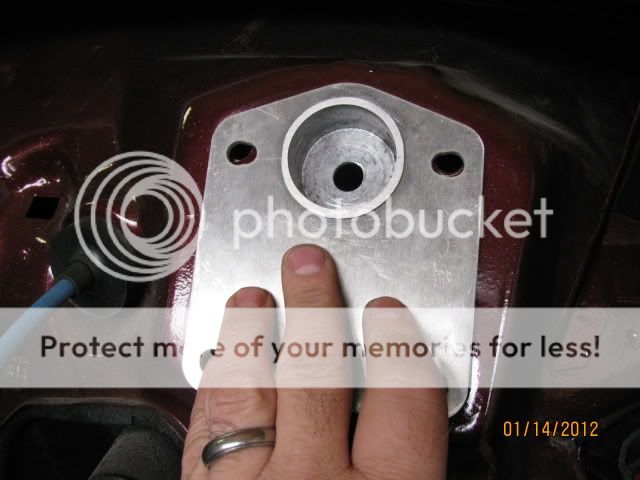
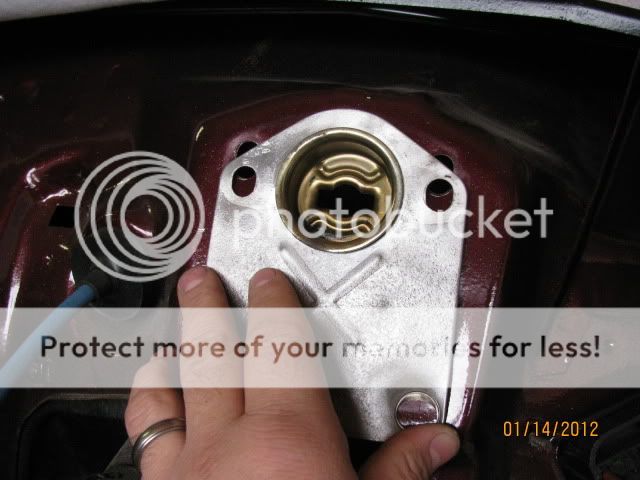
Instead....I'm using this aluminum adapter plate. Notice it has a integeral cup to retain the pushrod. More on that later...
Brakeairdam007.jpg

The opening in the firewall need some minor trimming when a pushrod retaining cup is used, not much, took about 2-3 minutes to open up the upper portion of the opening about 1/8", I test fitted the s10 type also, that cup size is larger and would have required even more trimming.
Brakeairdam009.jpg

Brakeairdam012.jpg

Thats it for now. Next weekend I hope to finish up and show some pictures of the custom pushrod and Manual master bolted up. Special thanks to Malibudave1978. He's helped me get this project headed in the right direction. The guy knows his stuff!!
.
 

guysmontess

Frequent Racer
Re: Manual brakes with pictures

Thanks for posting those pictures Wile E,I have also been following the posts on this subject.If it works as well as I hope it does,I may be doing the same thing,so keep the pictures & info coming !!!
Guy
 

rocketolds400

Amateur Racer
May 12, 2007
111
0
0
Columbus, OH
Re: Manual brakes with pictures

Thanks for taking the time to do a write-up! I'll be doing a conversion soon, but haven't decided on which route to take... :-k
 

slimbo

Moderator
May 21, 2007
4,223
0
0
www.yellowbullet.com
Re: Manual brakes with pictures

that upper hole yields a 5.5:1 ratio. depending on the master it is correct. for a 1 1/8 strange master a 6.5:1 is needed but for a 1.032 it is correct.
 

slimbo

Moderator
May 21, 2007
4,223
0
0
www.yellowbullet.com
Re: Manual brakes with pictures

IMAG0238.jpg


heres the bracket my buddy made me that holds a strange 1.032 master at the right hieght to line up with the upper pedal hole...works great
 

jacobgiles

Weekend Racer
Jun 27, 2007
68
0
0
Atoka TN
Re: Manual brakes with pictures

wile E,

did you fab or purchase the adapter plate?

which master are you going to use?

thanks...
 

Wile E

Dragway Regular
Thread starter
Aug 11, 2003
1,075
0
0
Central WISC
Re: Manual brakes with pictures

slimbo5, Thats beautiful!
jacobgiles, Malibudave1978 made the plate along with the adjustable pushrod I'll be picturing this weekend. I'm using
a new Raybestos 7/8" master cylinder part #39166
I'll be posting some more pics of the master cylinder and pushrod setup hopefully this weekend if I get time to work on it.
Nothing really exotic here, no 6 piston calipers or big inch rotors. Keeping it simple and within my budget.
 

Wile E

Dragway Regular
Thread starter
Aug 11, 2003
1,075
0
0
Central WISC
So here is the adjustable pushrod I'm using attached to the brake pedal, the longer pushrod is from the s10 set-up, but it would need to be shortend alot to work.
morebrakes007.jpg

Here's the factory pushrod still attached to the booster. The factory one is held captive within the booster and when the other end is attached to the brake pedal, it's a pretty solid and safe set-up that will not fall apart, when using a s-10 manual plate and cup, or one like I've shown with an attached cup, the push rod will not have an opportunity to lose contact with the master cylinder, without some type of pushrod retention, the pushrod could potentially lose contact if the pedal is over-extended. I understand some of the other custom set-ups also accomadate pushrod retention.
morebrakes004.jpg

Here's what the retention cup looks like from the interior side without the pedal assembly. (rubber boot not shown).
morebrakes014.jpg

Here's another veiw with the pedal/pushrod and boost installed. I used a original s10 boot, however it's a bit too long and not in the best shape, I may look for something that fits a little better. Also, notice the hole above the brake light switch, I believe it's for factory cruise control, It's not likely the push rod will fall away from the master with the retention cup, however
I plan on putting a bolt thru that hole and adjusting it to keep the pedal from over-extending (backwards) and having the pushrod fall out of the hole.
morebrakes023.jpg

Here's a pic from the firewall side.
morebrakes017.jpg

The kit I used came with some really nice detailed instructions, here's another picture of the parts I used (some nice stainless steel hardware was included shown in the firewall pic) thats the s10 set-up I had originally planned on using pictured next to the nice stuff.
brakes006-2.jpg

It will be a while before I get a chance to try all this out, calipers and brakes lines are on a LONG list of to do things.
 

malibudave1978

Amateur Racer
Jun 8, 2004
226
0
0
Houston, TX
For the most pedal travel and to make sure that the pushrod does not fall out of the back of the retention cup:

1. Disconnect the brake light connector from the brake light switch.
2. Unscrew the brake pedal switch from the brake pedal assembly.
3. Pull the brake pedal back toward the driver’s seat until it resting against where the brake light switch screws into the brake pedal assembly.
4. If the pushrod falls out the back of the cup, adjust the pushrod to a longer setting until the pushrod does not fall out the back of the retention cup. It just needs to be long enough not to fall out of the back of the retention cup.
5. Tighten the locking nut on the adjustable pushrod.
6. Screw the brake pedal switch back into the brake pedal assembly until the pushrod assembly barely touches the piston in the master cylinder. You DO NOT want any preload on the master cylinder piston. This may cause the brake pads or shoes to drag.
7. Connect the brake light connector back on the brake light switch.
 

MalibuRacing.com Gear

Stickers & Shirts!!